Securing cargo properly is crucial whether you’re hauling kayaks, motorcycles, or commercial freight. Tie down straps are the unsung heroes of load safety—when used correctly, they prevent shifting, damage, and even roadside disasters. But with so many strap types, strength ratings, and tensioning methods on the market, how do you pick the right gear and apply it with confidence?
Tie down straps are strong, adjustable webbing assemblies used to secure loads during transport. They come in ratchet and cam-buckle styles, with Working Load Limits (WLL) ranging from 500 lbs to over 10,000 lbs. Choosing the proper strap type, attachment point, and tensioning method ensures cargo stays put, protecting both your goods and everyone on the road.
Imagine rolling down the highway with your prized motorcycle perfectly locked in place—no wobbling or worry. In this guide, we’ll demystify strap selection, unpack best practices, and walk you through every step, from calculating required strength to maintenance tips. By the end, securing any load will feel as natural as buckling your seatbelt.
What Types of Tie Down Straps Exist?
Tie down straps come in ratchet, cam-buckle, and bungee styles. Ratchets offer the highest tension for heavy loads; cam-buckles suit lighter cargo and quick adjustments; bungees add flexibility but lower strength. Specialty straps—wheel nets, motorcycle anchors—address unique applications with tailored hardware.
When starting your strap-selection journey, it’s essential to know the three main categories of webbing-based tie downs:
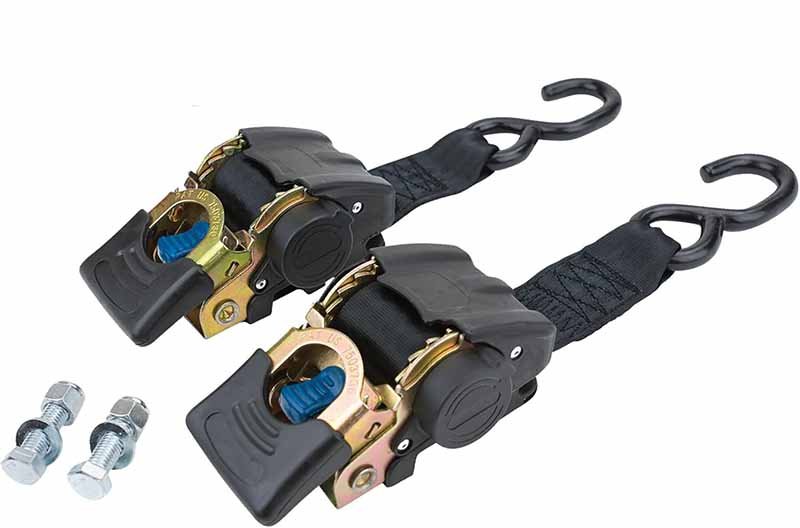
Ratchet Straps (Heavy-Duty):
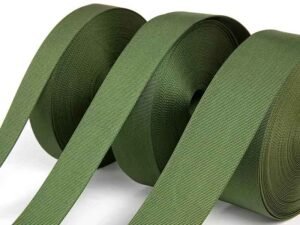
- Construction: Polyester webbing (1″–4″ wide), fitted with a steel ratchet mechanism.
- Strength & Control: Provide very high tension (up to WLL 10,000 lbs) and micro-adjustments, ideal for secured industrial and commercial loads.
- Use Cases: Transporting machinery, large equipment, or multiple pallets on flatbeds.
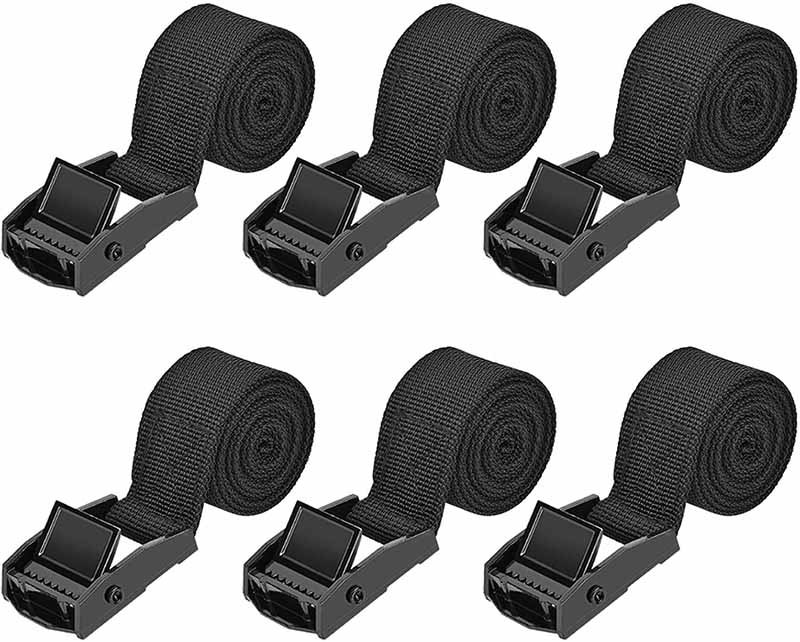
Cam-Buckle Straps (Light to Medium Loads):
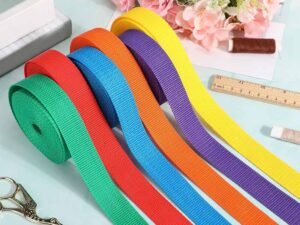
- Construction: Similar polyester webbing but uses a spring-loaded cam buckle.
- Ease of Use: Quick to release—simply press lever and pull webbing. Suitable for loads requiring frequent adjustments (e.g., roof racks, ladders).
- Strength Range: WLL typically from 500 to 3,000 lbs.
Bungee Cords (Elastic):
- Construction: Rubber core with a braided polyester sheath.
- Flexibility vs. Strength: Provide elastic tension but have low WLL (50–200 lbs), making them better for light-duty tasks like securing tarps.
- Limitations: Elastic fatigue over time; never use for heavy or critical loads.
Specialty Straps:
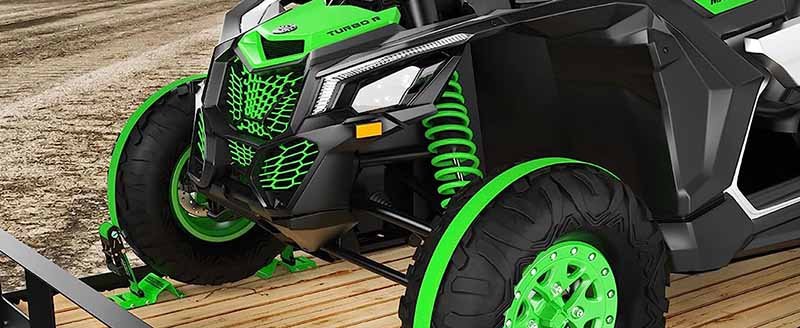
- Wheel Nets & Tire Straps: Polyester nets that wrap around wheels to prevent movement—popular in motorsports.
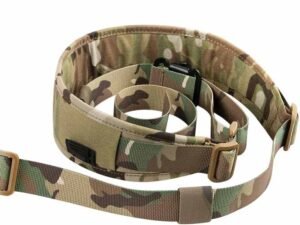
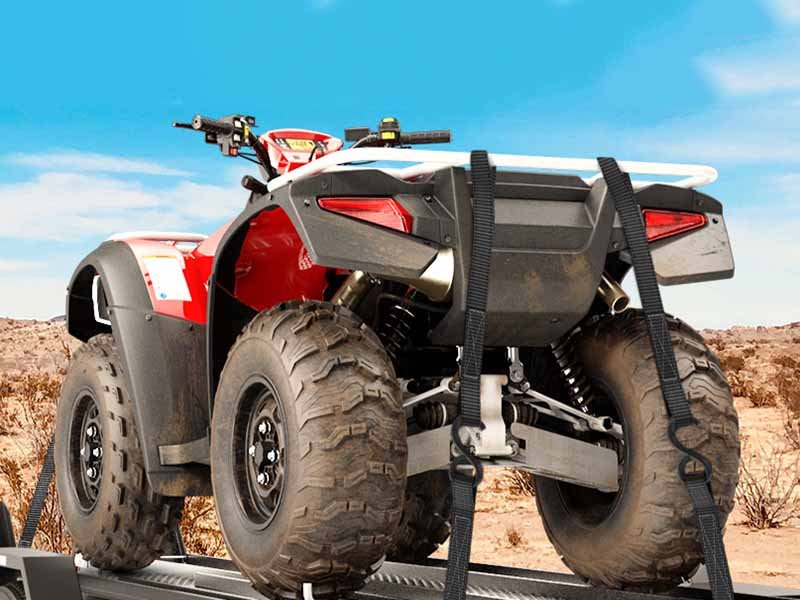
- Motorcycle Tie Downs: Straps with reinforced end loops and soft hooks designed to protect a bike’s finish.
- Cargo Nets & Load Bars: For oversized or irregularly shaped items.
Critically assess your cargo type, weight, and frequency of adjustment to choose the appropriate strap style. Investing in the right equipment upfront pays dividends in safety and longevity.
How Do You Calculate Required Strap Strength?
Determine the Working Load Limit (WLL) based on cargo weight—and always use straps rated at least half again as strong (50% rule). Compare WLL vs. Breaking Strength, and use multiple straps as needed to distribute load.
Securing a load begins with matching strap capacity to cargo weight. Two key concepts govern strength ratings:
- Working Load Limit (WLL):
- Defined as the maximum load a strap can safely hold. It’s determined by dividing the Breaking Strength by a safety factor (commonly 3:1 or 4:1).
- Example: A strap with a Breaking Strength of 15,000 lbs and a 4:1 safety factor has a WLL of 3,750 lbs.
- Breaking Strength:
- The point at which webbing or hardware will fail. This figure is useful for understanding absolute limits but never used directly for cargo calculations.
Applying the 50% Rule
A best practice is to overspecify:
- Cargo Weight: 2,000 lbs
- Total WLL Required: 2,000 lbs × 1.5 = 3,000 lbs
- Strap Selection: Two 2″ ratchet straps each WLL 2,000 lbs, for a combined WLL of 4,000 lbs
- Why 50% Rule? Accounts for side loads, dynamic forces during acceleration/deceleration, and uneven tensioning.
Calculating Strap Quantity
- Divide the combined WLL of your straps by the cargo weight.
- Table of Common Strap Ratings:
| Strap Type | Width | Typical WLL (lbs) | Breaking Strength (lbs) |
|---|---|---|---|
| Cam-Buckle | 1″ | 500–1,500 | 1,500–4,500 |
| Ratchet, Light | 1″ | 1,000–2,000 | 4,000–8,000 |
| Ratchet, Medium | 2″ | 3,000–5,000 | 12,000–20,000 |
| Ratchet, Heavy | 3″–4″ | 8,000–10,000+ | 32,000–40,000+ |
Critical Considerations
- Dynamic Forces: A sudden stop can quadruple tension on a strap momentarily.
- Environmental Factors: Wet or worn straps can lose up to 20% of strength.
- Hardware Strength: Hooks, buckles, and ratchets must match or exceed webbing capacity.
Measuring accurately and overspecifying capacity ensures your straps deliver reliable performance under all conditions.
Which Attachment Points Are Safest?
Use factory-rated anchors—bed rails, recessed D-rings, and chassis loops—rather than improvised points. Maintain a 45° angle between strap and load surface to maximize downward force. Avoid rounded, painted, or weak weld points.
Anchoring your strap securely is as important as the strap’s strength. Follow these guidelines:
Factory-Rated Anchors:
- Truck Bed Anchors: Often integrated into side rails or stake pockets, designed for tensile loads.
- Recessed D-rings: Found on trailers and flatbeds, they sit flush to avoid strap abrasion.
Ideal Angle of Pull:
- Straps should approach the load at a 45° angle to impart both downward and lateral force.
- Angle Rule: Forces at shallow (<30°) or steep (>60°) angles reduce effective tension and increase wear.
Avoid Improvised Points:
- Round or Painted Hooks: Paint can mask metal fatigue.
- Weak Welds or Structural Components: These can fail catastrophically under load.
- Sharp Edges: Can cut webbing under tension. Always use edge protectors or wear pads.
Specialty Hardware:
- Soft-Loop Anchors: Heavy-duty nylon loops that wrap around structural members to protect finishes.
- S-Hooks vs. J-Hooks: S-hooks are more secure but require precise seating; J-hooks are quicker but can unseat if slack forms.
Multiple Anchor Points:
- Distribute load evenly. For long or heavy items, use at least two straps per side, crisscrossed to prevent lateral shift.
By selecting certified anchor points and maintaining proper angles, you ensure that your tie down assembly works as intended, minimizing the risk of slippage or failure.
Step-by-Step: How to Secure Loads Properly
Position straps in a crisscross pattern, tension gradually without over-torquing, use edge protectors on sharp corners, and re-check every 50 miles. Ensure webbing lies flat, hooks fully seated, and attachment angles remain optimal to prevent shifting or strap damage.
1. Initial Assessment & Load Placement
Before you even touch the straps, take a critical look at both your cargo and your vehicle or trailer bed. Identify the heaviest items and place them directly over—or just forward of—the axle. This centralizes mass, minimizing sway and preventing your trailer’s tongue weight from dipping excessively. For oversized or irregularly shaped loads (like kayaks or ladders), plan how many straps you’ll need and where they’ll cross for maximum stability.
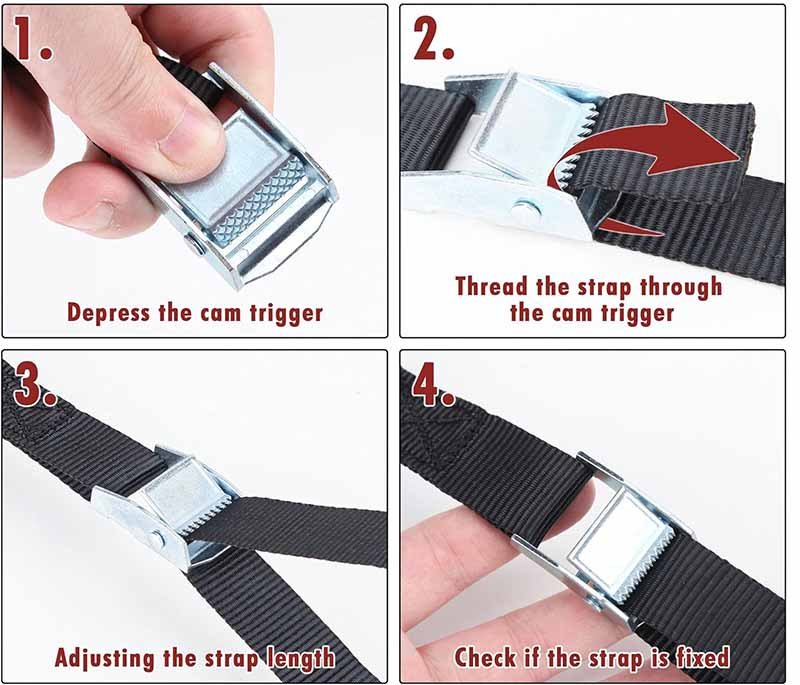
2. Threading & Routing for Maximum Efficiency
When you feed the webbing into the ratchet drum or cam buckle, make sure it’s entirely free of twists. A single half-twist can reduce load capacity by nearly 50%. Route the webbing in a direct line to the buckle—avoid sharp bends or acute angles that place stress on a small section of fibers. If you must wrap around an anchor point or object, use a soft loop strap or padding to protect both the webbing and the attachment surface.
3. Crisscross vs. Parallel Patterns
- Crisscross (“X”) Pattern: Ideal for tall or top-heavy items. One strap runs from the lower left anchor, up over the load, down to the opposite lower right anchor, and vice versa. This pattern prevents both sliding and tipping.
- Parallel Pattern: Suited for flat, uniform pallets or when multiple parallel straps run front-to-back. Ensure equal tension on each to avoid load rotation.
4. Gradual Tensioning & Torque Control
- Ratchet Straps: Pump the ratchet handle in smooth, even strokes. Listen for each click—stop when the handle clicks twice without further webbing movement. Apply just enough force to eliminate slack; if you feel the buckle resisting violently, you’ve likely gone past optimal tension.
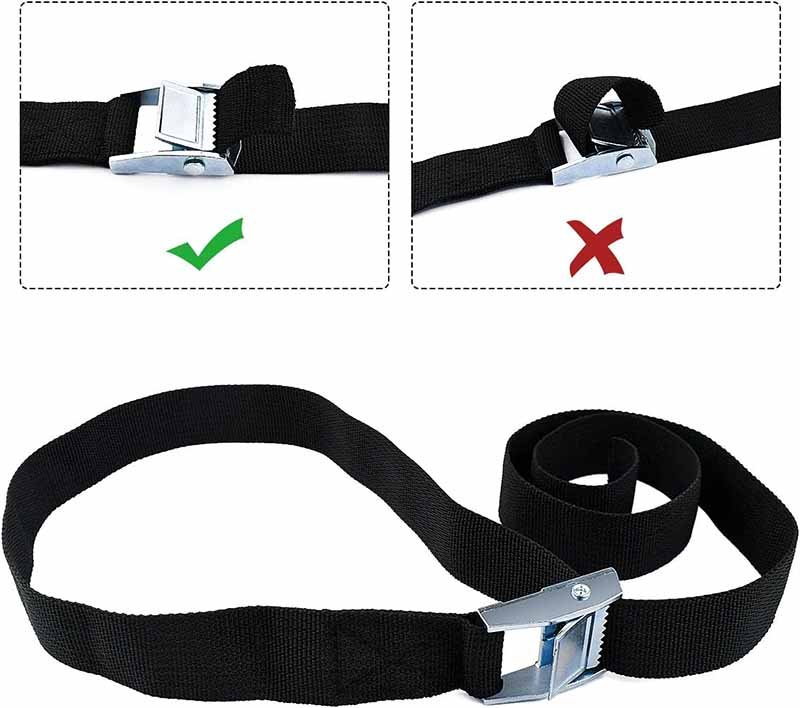
- Cam-Buckle Straps: Pull webbing tight by hand, then lock the cam firmly. If the strap slips under moderate pressure, back off and re-thread to ensure the cam lever fully engages the webbing.
5. Edge Protection & Abrasion Prevention
Wherever webbing contacts metal edges, corners, or sharp contours, insert an edge protector—a small rubber pad, leather sleeve, or purpose-built plastic guard. This distributes force over a wider area, preventing the webbing from being cut or compressed. For pipes or round bars, wrap the protector fully around the contact point to avoid pinch spots.
6. Final Safety Check & Documentation
Walk around your vehicle or trailer and perform a tactile check on each strap: give a firm tug to verify there’s no movement in the buckle or ratchet mechanism. Visually ensure all hooks are fully seated and not just hanging on the tip. Confirm that no webbing crosses are rubbing against each other under tension.
- Recordkeeping: Snap a quick photo of your setup—it provides a baseline for post-trip inspections and helps demonstrate due diligence if ever called into question by an insurance claim.
7. Ongoing Monitoring & In-Transit Adjustments
Vibration, temperature changes, and load settling can all loosen straps over time. Plan at least one mid-journey check: stop after the first 10 miles, inspect, and re-tension as necessary. Then continue routine checks every 50 miles or after crossing rough terrain. Small adjustments early prevent large, dangerous shifts later.
By following these steps with precision and consistency, you’ll transform what can feel like guesswork into a predictable, reliable process—one that keeps your cargo secure and everyone on the road safe.
What Are Common Tie Down Mistakes?
Avoid twisted webbing, excessive slack, and UV-damaged straps. Never ignore weather impacts—wet webbing loses grip—and don’t overtighten to prevent material stress. Regularly inspect for fraying and rusted hardware.
Even experienced haulers can fall prey to these pitfalls:
Twisted Webbing:
- Consequence: Reduces strength by up to 50% due to uneven load distribution.
- Prevention: Lay webbing flat before tensioning; visually confirm no kinks remain.
Improper Slack Management:
- Too Loose: Load can shift or topple.
- Too Tight: Overstressed webbing and cargo damage.
- Best Practice: Maintain ≤3 inches of visible slack.
UV & Weather Exposure:
- UV Damage: Prolonged sun exposure degrades polyester and nylon fibers—look for discoloration or brittleness.
- Wet Conditions: Water lubrication can reduce friction in cam buckles, decreasing holding power by up to 20%.
Hardware Neglect:
- Rusted Ratchet Gears/Bolts: Can bind or fail under load.
- Bent Hooks: Indicate past overload or misuse—replace immediately.
Overloading Single Straps:
- Scenario: A single strap securing a heavyweight motorcycle—if it fails, the entire load shifts.
- Solution: Always use at least two straps per heavy item, crisscrossed for redundancy.
Ignoring Label Ratings:
- Label Removal: Stickers and tags are rated for the life of the strap—don’t remove them.
- Faded Printing: If ratings are unreadable, retire the strap or contact the manufacturer.
By recognizing and correcting these mistakes, you extend the service life of your equipment and protect both your cargo and your reputation.
How to Maintain Tie Down Straps?
Clean straps with mild soap and water, air-dry in shade, and store coiled in a dry place. Inspect regularly for frays, broken stitches, or rust. Replace straps showing wear—do not attempt field repairs.
Proper maintenance ensures consistent performance and extends strap lifespan:
Cleaning Methods:
- Mild Soap & Water: Gently scrub webbing with a soft brush; avoid harsh detergents or bleach which weaken fibers.
- Rinse Thoroughly: Remove all soap residue to prevent stiffness.
Drying & Storage:
- Air-Dry in Shade: Direct sunlight can accelerate UV degradation.
- Coil Neatly: Prevents twists and kinks.
- Dry, Ventilated Area: Moisture fosters mold, mildew, and hardware corrosion.
Regular Inspections:
- Visual Checkpoints: Look for frayed edges, deep cuts, or broken stitches.
- Hardware Test: Operate ratchet and cam buckles through full range; ensure smooth action.
When to Replace:
- Fraying Exceeds 10% of Webbing Width: Weakens load capacity.
- Stretched Webbing: Permanent elongation over 5% indicates material fatigue.
- Corroded Hardware: Any rust pitting is grounds for replacement.
Record-Keeping:
- Log Usage Hours: Particularly in rental or industrial fleets.
- Maintenance Calendar: Schedule quarterly inspections for high-use straps.
Disposal & Recycling:
- Cut into unusable lengths before discarding to prevent accidental reuse.
- Recycle Polyester Webbing: Some facilities accept clean synthetic textiles.
A disciplined maintenance routine safeguards your investment and ensures compliance with safety regulations.
Are There Minimum Order Quantities, Lead Times, and Pricing Factors?
Custom webbing straps often require low MOQs (as low as 50 pcs) from specialized factories. Typical lead times range from 10–21 days. Pricing hinges on material, width, printing or weaving complexity, hardware type, and order volume.
For businesses and brands, understanding production logistics is vital:
Minimum Order Quantities (MOQs):
- Szoneier Capability: Custom MOQs starting at 50 pieces, with stock options for single-piece orders.
- Trade-Off: Lower MOQs may incur higher per-piece costs but reduce upfront inventory risk.
Lead Times:
- Standard Production: 10–14 days for basic designs (solid color webbing with standard hardware).
- Complex Orders: 14–21 days when adding jacquard weaving, digital printing, or specialty fittings.
- Express Options: Rush services can be arranged at a premium.
Pricing Drivers:
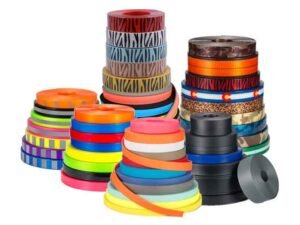
- Material Type: Nylon webbing (higher tensile strength) vs. polyester (UV resistance) vs. PP (cost-effective).
- Width & Thickness: Wider or heavier webbing uses more raw material.
- Customization Complexity:
- Printing vs. Weaving: Woven logos/intricacies cost more than surface-print.
- Hardware Quality: Corrosion-resistant zinc vs. stainless steel vs. aerospace-grade aluminum.
Volume Discounts:
- Price tiers commonly at 100, 500, 1,000 pcs—larger runs unlock lower unit pricing.
- Inventory Plans: Consider stocking popular SKUs to capitalize on economies of scale.
Sample & Prototyping:
- Free sample service helps validate design before bulk ordering.
- Prototype charges may apply when tooling or custom molds are needed.
By balancing MOQs, lead times, and customization needs, you craft a procurement strategy that aligns with both budget and branding goals.
What Common Mistakes Should You Avoid When Using Tie Down Straps?
Don’t overtighten, twist webbing, or ignore strap ratings. Avoid using bungees for heavy loads. Never anchor to weak points, and always inspect straps before each use.
Even seasoned professionals slip up. Watch for these pitfalls:
Overtightening:
- Damage Risk: Excessive force can cut into cargo or overstress webbing, leading to premature failure.
- Symptom: Webbing indentations or hardware strain.
Twisted or Knotted Webbing:
- Risk: A twist is effectively a weak point, concentrating load stress.
- Fix: Always run webbing flat through the buckle; rotate strap if necessary before ratcheting.
Improper Use of Bungees:
- Limitation: Bungee cords should never replace webbing straps for any cargo over 200 lbs.
- Consequence: Elastic give can allow loads to shift dangerously.
Anchoring to Rusted or Painted Points:
- Hazard: Paint can hide corrosion; rust weakens metal anchors.
- Solution: Inspect anchor points and choose certified, exposed metal loops.
Skipping Tension Checks:
- Reality: Vibration and load settling occur constantly.
- Practice: Pull over after the first 10 miles and every 50 miles thereafter for a tension check.
Ignoring Environmental Wear:
- UV & Chemicals: Road salt, fuel, and oils can degrade webbing.
- Prevention: Clean straps after exposure and store in protective sleeves when possible.
By consciously avoiding these mistakes, you uphold safety standards, reduce liability, and extend the operational life of your tie downs.
Conclusion
Mastering tie down strap use isn’t just about hardware—it’s about protecting people, cargo, and your reputation. From selecting the right type and calculating WLL, through proper anchoring and maintenance, each step safeguards your investment on the road.
Ready to elevate your load-securing game? Szoneier’s 18+ years of webbing R&D and manufacturing expertise means we can custom-design straps tailored to your exact needs: nylon, polyester, PP, cotton webbing, bespoke patterns, branded logos, reinforced hardware, and more. Contact Szoneier today for free design consultation, low MOQs, fast prototyping, and industry-leading quality assurance. Secure smarter—secure with confidence.