Have you ever sat on an old chair only to feel it sag like a hammock? Wobbly seats are not only awkward—they can also ruin the aesthetic of a beloved piece. Whether it’s a vintage dining chair or a modern accent seat, properly tensioned webbing can breathe new life into your furniture. In this guide, you’ll discover exactly how to replace worn-out springs or sagging fabric with durable upholstery webbing, ensuring your seat is both comfortable and supportive.
Reupholstering a chair seat with webbing involves removing the old support material, measuring and cutting new webbing, attaching it securely to the frame with a webbing stretcher and staple gun, then adding padding and fabric. This method restores firm, even support without relying on springs, extending the life of your chair.
Imagine transforming that creaky kitchen chair into a sturdy, showroom-ready piece—all by learning a few simple steps. In this step-by-step tutorial, we’ll walk through everything from choosing the right material to avoiding common mistakes. Stay tuned, because by the end, you’ll be able to confidently reupholster any chair seat with webbing—no professional experience required.
What Is Upholstery Webbing and Why Is It Used for Chair Seats?
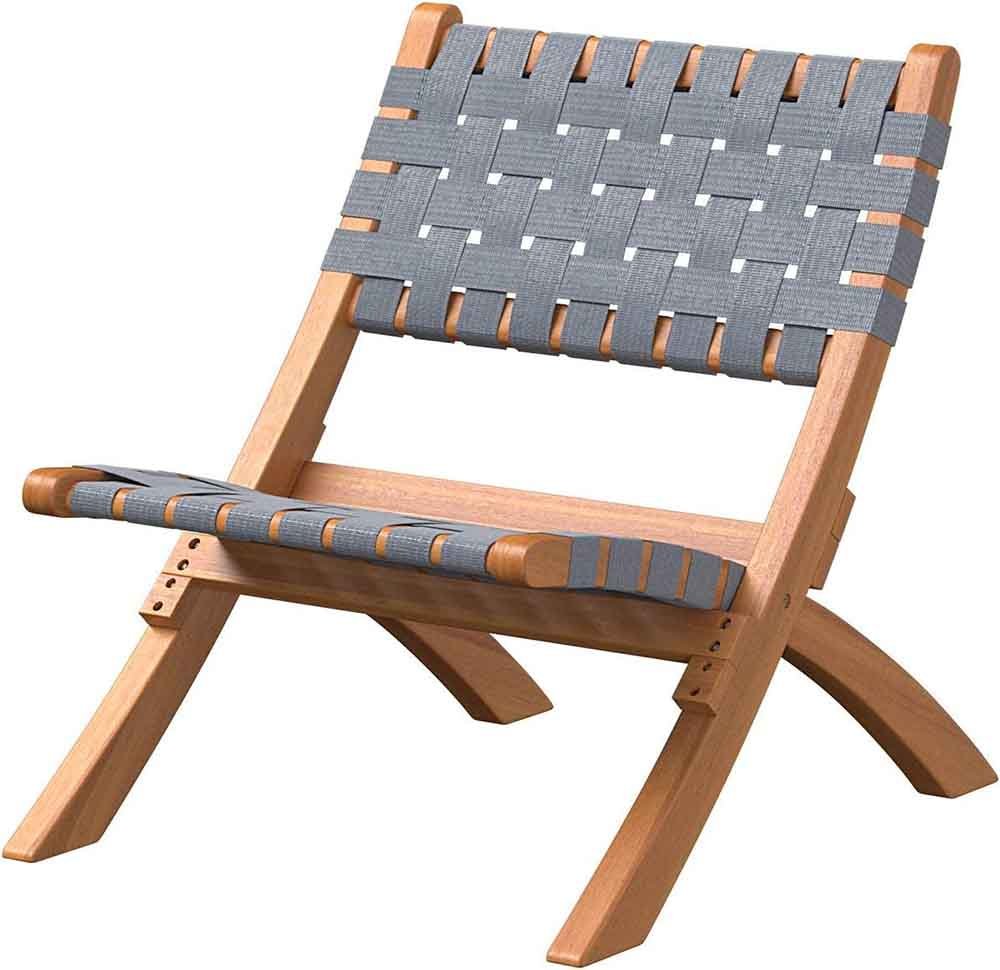
Upholstery webbing is a strong, woven strap—usually made of jute, cotton, nylon, or polyester—designed to provide even support under chair seats. It replaces sagging springs and loose fabric, distributing weight evenly and prolonging the life of the upholstered surface.
Understanding the Basics of Webbing
Definition: Upholstery webbing refers to flat, resilient strips of woven material used in furniture construction. Unlike springs, webbing offers uniform support, resisting sagging over time.
Key Function: It creates a taut foundation under foam or padding, ensuring the seat holds its shape. When properly tensioned, the webbing prevents dips and uneven wear.
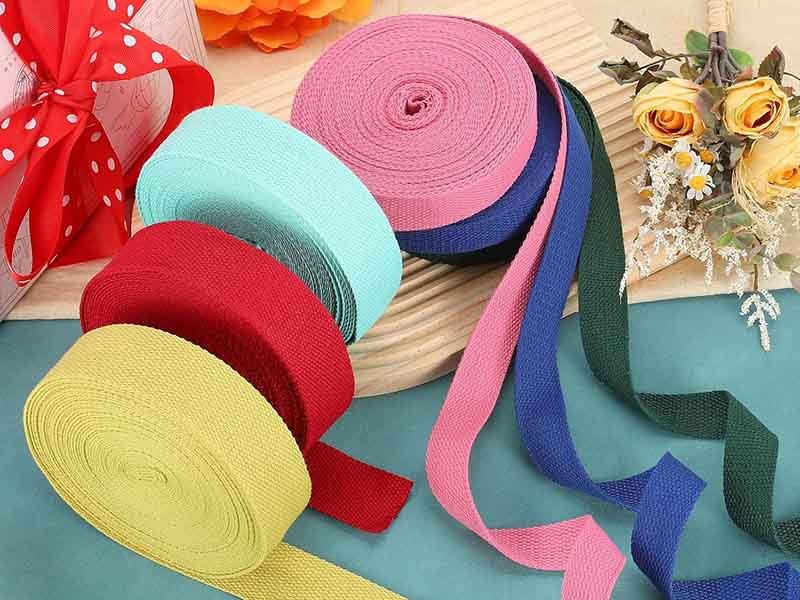
Material Options: Webbing may be made from natural fibers (jute, cotton) or synthetic fibers (nylon, polyester). Each has its own stretch, durability, and cost profile.
Why Choose Webbing over Springs or Foam Alone?
Even Weight Distribution:
Springs can concentrate pressure at certain points, leading to premature sagging. Webbing spreads the weight across the entire seat area, preventing “hot spots.”
Cost-Effectiveness:
Springs often need special tools and expertise to install.
Webbing is relatively inexpensive (as low as $0.50 per yard for jute; see table below) and can be tensioned with a simple stretcher and staple gun.
Ease of Installation and Repair:
Replacing a spring system may require dismantling large sections of frame.
Webbing can be installed in under an hour with basic tools.
Noise Reduction:
Springs can squeak over time, while webbing remains silent as long as it’s correctly tensioned.
Longevity:
Good-quality webbing (nylon or polyester) can last over 10 years without visible sagging, even under heavy daily use.
Cost Comparison of Common Upholstery Webbing Materials
Material
Price per Yard (Approx.)
Tensile Strength (lbs)
Typical Stretch (%)
Common Uses
Jute
$0.50 – $1.00
150 – 200
5–10
Antique furniture, budget
Cotton
$1.00 – $1.50
250 – 300
8–12
Medium-duty chairs, benches
Polyester
$1.50 – $2.50
400 – 500
3–5
High-use dining chairs
Nylon
$2.00 – $3.00
500 – 700
2–4
Heavy-duty seats, commercial
Data above is illustrative; actual prices and strengths may vary by supplier.
Real-World Example: How Webbing Saved a Family Heirloom
Last year, I inherited my grandmother’s antique rocker—solid oak frame, hand-carved details, but the seat had completely collapsed. Instead of replacing the entire base, I opted for nylon webbing. After removing loose springs and tattered fabric, I installed new webbing straps at four-inch intervals. The result? The rocker felt as sturdy as the day it was built, and it still looks original.
Which Types of Webbing Are Best Suited for Chair Seat Reupholstery?
The best webbing materials for chair seats are nylon and polyester due to their high tensile strength, low stretch, and moisture resistance. Natural options like jute or cotton are more affordable but stretch over time and may require more frequent retensioning.
Comparing Webbing Materials in Detail
1. Jute Webbing
Pros:
Very economical (around $0.50 per yard)
Traditional look for antique or rustic chairs
Cons:
Prone to stretch and sag within 1–2 years under heavy use
Sensitive to moisture—can mold if damp
2. Cotton Webbing
Pros:
Slightly stronger than jute (up to 300 lbs tensile)
Softer feel under the padding, ideal for medium-duty seating
Cons:
Stretches 8–12% over time, requiring periodic tightening
Can degrade faster in humid environments
3. Polyester Webbing
Pros:
Strong (400–500 lbs tensile) and low stretch (3–5%)
Moisture-resistant and mildew-resistant—perfect for kitchens or high-humidity areas
Cons:
More expensive than jute or cotton ($1.50 – $2.50 per yard)
Slightly less flexibility, may feel firmer underfoot
4. Nylon Webbing
Pros:
Highest tensile strength (up to 700 lbs)
Minimal stretch (2–4%), excellent for commercial or heavy-use chairs
Cons:
Costliest option ($2.00 – $3.00 per yard)
Can be slippery during installation if not handled properly
What Material Do You Use to Weave a Chair Seat?
Answer in Context:
When choosing webbing, balance budget, expected usage, and longevity. For most home chairs, polyester webbing offers a sweet spot—affordable, sturdy, and low-maintenance. If you want top performance and can justify the cost, nylon webbing is hard to beat.
How Do I Remove the Old Webbing and Prepare the Chair Frame?
To remove old webbing, start by flipping the chair, removing the seat cushion, and using pliers to pull out staples or tacks. Inspect the frame for cracks, reinforce any weak joints with wood glue or corner brackets, then sand rough spots to ensure a clean surface for new webbing installation.
Step 1: Set Up Your Workspace
Clear Area: Lay down a drop cloth or an old sheet to catch debris.
Tools at the Ready: Keep pliers, a flathead screwdriver, needle-nose pliers, and a small hammer nearby.
Step 2: Remove Fabric, Padding, and Existing Webbing
Detach the Seat Cushion:
Turn the chair upside down.
Unscrew any bolts or clips holding the seat base in place.
Carefully lift off the cushion/panel.
Peel Away Fabric and Batting:
Use a flathead screwdriver to loosen old staples and tacks.
Pull the fabric and batting away, saving them for tracing patterns later if desired.
Keep a trash bag handy for ripped materials.
Extract Old Webbing Straps:
Use needle-nose pliers to grip staples or tacks securing the webbing.
Slowly pull out each staple, being careful not to tear the wood.
Remove all strips, and set aside any salvageable springs if the chair had a mixed suspension.
Step 3: Inspect and Repair the Frame
Check for Loose Joints: Wiggle the seat base against the legs. If there’s movement, apply wood glue to seams and clamp until dry (usually 24 hours).
Look for Cracks or Splits:
Small cracks can be stabilized with wood filler; let cure and sand smooth.
Larger splits may need a small corner bracket and screws to reinforce.
Sand Rough Areas: Use 120-grit sandpaper to gently smooth nail holes or splintered wood where webbing will attach. A clean surface ensures staples bite properly.
Step 4: Mark Webbing Attachment Points
Outline Webbing Grid:
If your design uses five strips front to back, mark five equidistant points on both the front and back rails.
For lattice patterns (cross-weaving), additionally mark side rails.
Use a Chalk Line: Snap a line between opposite attachment marks to guide straight webbing runs.
How Do I Measure and Cut Webbing for a Perfect Fit?
Measure the distance between the front and back rails along each attachment mark, then add 4–6 inches per strip for overlap and stapling. Always cut strips slightly longer—about 10–15% extra length ensures enough webbing to tension and secure without risking shortage.
Determining Webbing Width and Spacing
Standard Widths: Most upholstery webbing comes in 2 in, 2.25 in, or 3 in widths.
Dining Chairs / Light-Use Seats: 2 in or 2.25 in webbing spaced 3–4 in apart.
Heavy-Use or Commercial Chairs: 3 in webbing spaced 2.5–3 in apart.
Spacing Guidelines:
Closer spacing (2.5 in) yields a firmer seat—ideal for people who sit for long hours.
Wider spacing (4 in) offers more give but may sag more over time.
Calculating Length with Stretch Factor
Webbing Stretch Concept: All webbing stretches under tension. Natural fibers may stretch up to 10%, synthetics 2–5%.
Length Formula:
Measure rail-to-rail inside dimension (in inches).
Multiply by 1.10 (for jute/cotton) or 1.05 (for polyester/nylon) to account for stretch.
Add 6 in per end for stapling and tensioning.
Example Calculation for Polyester Webbing:
Rail-to-Rail Measurement: 16 in
Length with Stretch: 16 in × 1.05 = 16.8 in (round to 17 in)
Add Staple Allowance: 17 in + (6 in × 2 ends) = 29 in total per strip
Cutting the Webbing
Use Sharp Scissors or Utility Knife: To get a clean edge that won’t fray.
Seal Cut Ends (for synthetics): Quickly pass the cut edge through a low flame (from a lighter) to melt fibers and prevent unraveling. Do this in a well-ventilated area and use long tweezers.
Label Strips: Number each strip with a small piece of painter’s tape (“1F” for first strip front-to-back, etc.) to keep track during installation.
What Tools and Materials Are Needed for Webbing Reupholstery?
Essential tools include an upholstery webbing stretcher, heavy-duty staple gun, and pliers. You’ll also need high-tensile upholstery webbing, 1/2 in 18-gauge staples, fabric-scissors, batting or foam padding, and your chosen upholstery fabric. Having a chalk line, measuring tape, and flathead screwdriver rounds out the toolkit.
Essential Tools Checklist
Tool
Purpose
Upholstery Webbing Stretcher
Tensioning webbing evenly across the frame
Heavy-Duty Staple Gun
Securing webbing, padding, and fabric to the frame
½ in, 18-Gauge Staples
Common upholstery staples for webbing and fabric attachment
Pliers (Needle-Nose)
Removing old staples, adjusting webbing tension if needed
Flathead Screwdriver
Prying staples, tacks, or t-nails; lifting stubborn webbing
Chalk Line
Marking straight attachment lines for accurate spacing
Measuring Tape
Measuring webbing lengths and seat dimensions
Scissors or Utility Knife
Cutting webbing, fabric, and foam cleanly
Hammer (Small Claw)
Tapping in tacks or brads if needed, removing nails
Safety Goggles & Gloves
Protecting eyes and hands during staple removal and hammering
Materials and Supplies
Webbing Material (Calculate Total Length Needed):
See “How Do I Measure and Cut Webbing…” for length calculation.
Purchase 10–15% extra to account for mistakes or adjustments.
Padding and Batting:
High-Density Foam: 2 in–3 in thickness for firm support; densities between 1.8 lb/ft³ and 2.5 lb/ft³.
Dacron Batting: 1 in–2 in layers over foam to smooth edges.
Upholstery Fabric:
Durable woven fabric rated for at least 15,000–20,000 double rubs (rub test) for longevity.
Prewash if fabric is natural fiber to prevent shrinkage.
Adhesive Spray (Optional):
Holds foam in place before stapling; use a low-tack, repositionable spray to avoid chemical damage.
Corner Brackets and Wood Glue (Optional):
For reinforcing weak frame joints during prep.
Tacks or Decorative Nails (Optional):
If you prefer a traditional finish around the edges instead of staples.
Example Cost Breakdown for a Single Chair Reupholstery
Item
Quantity
Unit Cost (Approx.)
Total Cost
Nylon Webbing (2.5 in x 30 ft)
1 roll
$25.00
$25.00
High-Density Foam (2 in x 18 in x 18 in)
1 piece
$10.00
$10.00
Dacron Batting (2 yds)
2 yards
$5.00/yard
$10.00
Upholstery Fabric (0.75 yd)
0.75 yards
$15.00/yard
$11.25
Staples (1,000 count)
1 box
$8.00
$8.00
Adhesive Spray (optional)
1 can
$6.00
$6.00
Subtotal
$70.25
Tax (8%)
$5.62
Grand Total
$75.87
Prices are illustrative and will vary by region and supplier. Buying in bulk can reduce per-unit costs significantly.
How Do I Install and Tension New Webbing Correctly?
To install new webbing, secure one end to the back rail with a staple, pull the webbing taut using a stretcher, then staple to the front rail. Continue adding parallel strips at marked intervals, ensuring each strip is equally tensioned. For cross-weave patterns, weave side strips over and under before tensioning and stapling.
Step-by-Step Installation Process
Attaching the First Strip
Anchor One End:
Align first webbing strip with the chalk line on the back rail.
Fold webbing over rail, leaving about 3 in for stapling behind.
Insert 3–4 staples spaced 1 in apart to secure.
Tension Using the Webbing Stretcher:
Slide the stretcher tool under the free end of the webbing.
Pump the handle until the strip is taut—no visible sag is permitted, but avoid overstretching.
Secure to the Front Rail:
While holding tension, fold webbing over the front rail and staple 3–4 times.
Check alignment to ensure the strip runs straight between rails.
Adding Parallel Strips
Maintain Equal Spacing:
Use your chalk lines or a ruler to measure consistent intervals (e.g., 3 in) for each strip.
Staple each anchored end with 3–4 staples, tension with the stretcher, and finish with 3–4 staples at the opposite rail.
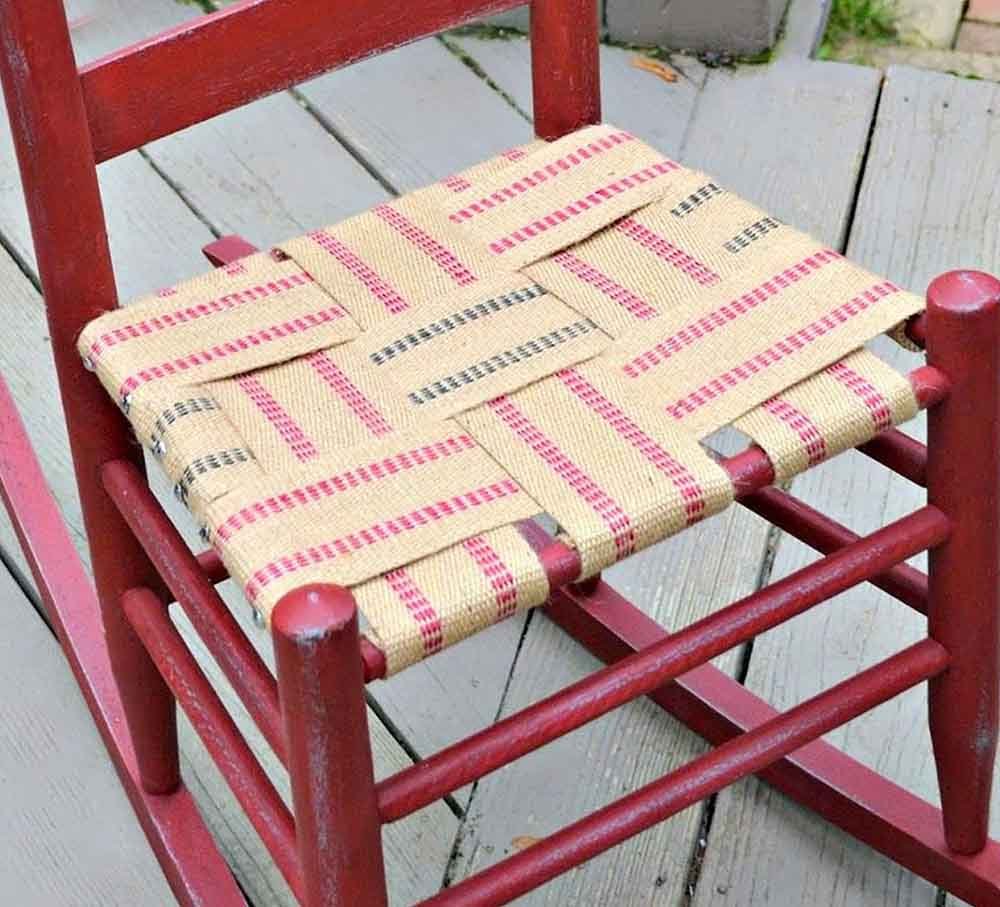
Creating a Cross-Weave Pattern (Optional)
Install Vertical Strips First:
Anchor and tension vertical strips front to back, leaving them in place without trimming ends.
Weave Horizontal Strips:
Start at one side rail; feed webbing over the first vertical strip, under the next, and so on.
Anchor and tension each horizontal strip before weaving the next to maintain grid uniformity.
Secure All Ends:
Once weaving is complete, trim excess webbing to leave exactly 3 in for stapling.
Fold ends neatly under the rail and staple with 3–4 staples.
Achieving Consistent Tension
Visual Check: All straps should appear flat against the frame. No strip should visibly sag or bulge.
Manual Test: Press down firmly in the center of each strip—there should be minimal give, but enough feel for comfort.
Adjust if Necessary: If any strip is too loose, remove a few end staples, retension, and restaple.
Securing Corners and Overlaps
Overlap vs. Butt Joint:
Overlap joints (where one strip extends past the frame and is stapled on top of itself) offer added strength but use more webbing.
Butt joints (ends meet flush against the rail) require precise cutting to avoid fraying—seal synthetic ends carefully.
Avoiding Sharp Angles: Round off any corners of the webbing where it bends around the frame to prevent tearing over time.
How Do I Add Padding and Cover Fabric Over the Webbing?
First, lay a layer of high-density foam over the webbed base and spray adhesive lightly to hold it. Cover foam edges with Dacron batting for smoothness, then place the fabric with excess edges facing underside. Pull fabric taut, staple along one side, then opposite side, smoothing wrinkles as you go. Finally, fold corners neatly and secure with staples or tacks.
Choosing the Right Padding
Foam Density Explained:
Light-Duty (1.5 lb/ft³): Best for decorative chairs with minimal use.
Medium-Duty (1.8–2.0 lb/ft³): Suits dining chairs or occasional seating.
High-Density (2.2–2.5 lb/ft³): Ideal for heavy daily use (office chairs, family room seats).
Thickness Guidelines:
Standard dining chairs: 2 in foam offers balanced comfort and support.
Accent chairs or lounge chairs: 3 in–4 in foam for a plusher feel.
Installing Foam and Batting
Position the Foam:
Cut foam to match the shape and slightly undercut the edges by ½ in so corners fold cleanly.
Spray adhesive on webbing (low-tack) and press foam into place—let it cure for a few minutes.
Wrap with Dacron Batting:
Lay a single layer of batting over foam, pulling edges down along the underside of the seat frame.
Staple batting every 2 in around perimeter to hold it taut—avoid lumps by smoothing with hands as you go.
Attaching the Upholstery Fabric
Preparing the Fabric
Cut with Seam Allowance:
Measure from front rail, over foam and batting, to back rail; add 4 in on all sides for folding and stapling.
If your seat has rounded corners, add an extra 1–2 in at each corner for comfortable folding.
Pre-Wash/Protect Fabric:
If working with natural fibers (cotton, linen), prewash to prevent shrinkage.
For delicate prints, iron and treat for stain resistance if desired.
Stapling Technique
Start at the Center of One Side:
Pull the fabric taut (but not overstretched) and place a staple at the middle of the front rail.
Move to Opposite Side:
Pull fabric taut horizontally and staple at the center of the back rail.
Work Toward Corners:
Continue stapling outwards from center to corners, alternating front and back to keep tension even.
Secure Remaining Sides:
After the primary sides are done, staple left and right rails in the same center-out pattern.
Folding Corners Neatly
Mitered Corner Method:
Pull the fabric corner up so it forms a diagonal fold.
Tuck one side down, folding excess under to create a triangle.
Staple the folded edge flush against the frame.
Smooth any wrinkles before final staple.
Hospital Corners (for Straight Edges):
Fold top edge down 90 degrees over the corner.
Fold the side edge across the first fold, creating a tight diagonal flap.
Pull and staple both horizontal and vertical edges securely.
Final Touches
Trim Excess Fabric: Using sharp scissors, cut within ½ in of staples to reduce bulk.
Add Decorative Elements (Optional):
Use tacks or decorative nails along the rail for a refined look.
Add welting or piping around the edge to conceal staple lines.
Test Seat Comfort:
Sit and press firmly to check for lumps or uneven support.
If foam shifts, lift the fabric at one staple line, adjust foam, and restaple.
What Common Mistakes Should I Avoid When Reupholstering with Webbing?
Avoid under-tensioning webbing—this leads to sagging. Don’t skip frame inspection; weak joints cause future failures. Select webbing width and material based on chair weight and expected use. Finally, avoid trimming webbing too short; leave at least 3 in for proper stapling.
Mistake 1: Choosing the Wrong Webbing Material
Assuming All Webbing Is the Same:
Jute may seem cheaper, but it stretches up to 10% and loses shape quickly on frequently used chairs.
Nylon is strong but overkill for light-use accent chairs—adds unnecessary cost.
Solution:
Match webbing choice to chair’s intended use. Check tensile strength ratings and choose accordingly.
Mistake 2: Inadequate Tension During Installation
Signs of Under-Tensioned Webbing:
Seat dips in the middle immediately after installation.
Over time, edges of foam become exposed as webbing sags.
Correct Approach:
Use a reliable webbing stretcher rather than manual pulling.
Check tension visually and manually—no noticeable sag when pressing down.
Mistake 3: Neglecting Frame Reinforcements
Ignoring Loose Joints:
Even the best webbing can’t compensate for a wobbly frame.
Loose glue joints cause frame rails to shift under tension.
Pro Tip:
Never skip the frame inspection step. A well-glued and clamped joint increases overall seat lifespan by years.
Mistake 4: Incorrect Webbing Spacing
Too Wide or Too Narrow:
Wide spacing (over 4 in) on high-use seats leads to rapid sagging.
Narrow spacing (under 2 in) wastes material and can feel too firm.
Rule of Thumb:
For dining chairs: 3 in spacing with 2.5 in webbing.
For office or lounge chairs: 2.5 in spacing with 3 in webbing.
Mistake 5: Trimming Webbing Too Short
Not Leaving Enough Staple Allowance:
Cutting to the exact rail-to-rail measurement means no extra for folding over the frame.
Results in frayed ends or weak attachment points.
Fix:
Always add 6 in (3 in per side) for staple allowance. Seal synthetic ends to prevent fraying.
Mistake 6: Improper Corner Folding
Bulky or Wrinkled Corners:
Careless folding creates lumps under fabric, making seats uncomfortable and unattractive.
Solution:
Practice mitered or hospital corner methods on scrap material before final upholstery.
Mistake 7: Skipping Padding Quality Checks
Cheap, Low-Density Foam:
Collapses quickly, negating even perfectly tensioned webbing.
Can leave the seat feeling too firm or too soft—no balance.
Recommendation:
Invest in medium- to high-density foam (1.8 lb/ft³ or above). Test by pressing foam to ensure it rebounds quickly.
Conclusion
Reupholstering a chair seat with webbing is a rewarding DIY project that combines both functional improvement and aesthetic renewal. By selecting the right material, preparing your frame properly, and following the tensioning and padding steps, you’ll transform a sagging seat into a supportive, comfortable chair that lasts for years. Remember to avoid common pitfalls—like under-tensioning or using low-density foam—so you don’t have to redo work soon after.
If you’re ready to take your upholstery to the next level or need custom webbing solutions for multiple chairs, Szoneier has you covered. With over 18 years of experience in research, development, and manufacturing of high-quality webbing products, Szoneier can provide tailored webbing in nylon, polyester, cotton, or PP, complete with free design support, low minimum order quantities, and fast sampling. Contact Szoneier today to get a quote for your custom webbing needs and elevate your upholstery projects with professional-grade materials.
If you have your own artwork, logo design files, or just an idea,please provide details about your project requirements, including preferred fabric, color, and customization options,we’re excited to assist you in bringing your bespoke bag designs to life through our sample production process.
Looking for premium custom webbing? Contact us now for competitive pricing, free samples, and expert consultation. Fill out the form below, and our team will get back to you within 24 hours!