From Inquiry to Delivery

How Do You Stretch Upholstery Webbing for a Taut, Durable Seat?

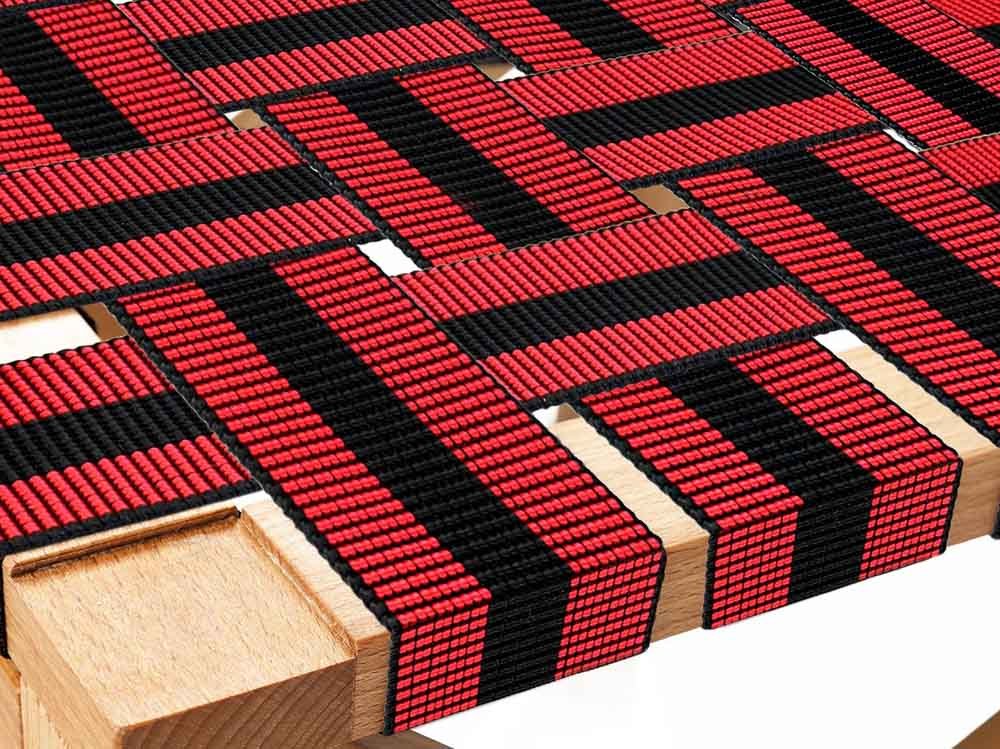
When your favorite armchair or vintage sofa starts to sag in the seat, it’s not just uncomfortable—it can compromise the entire piece’s structural integrity. Upholstery webbing, the hidden backbone beneath your cushions, is designed to provide support and resilience over years of use. But even the best-quality webbing can lose tension over time, leading to drooping, uneven seating, and shortened furniture life.

Stretching upholstery webbing requires the right materials and a reliable stretcher tool. Secure the first strip firmly, then use a ratchet or manual stretcher to apply consistent tension across each strip before fastening with staples or tacks. Proper technique ensures a level, supportive foundation for cushions and long-term durability.

Imagine discovering your grandmother’s antique rocker—still beautiful but with a seat so soft it feels more like sinking than sitting. Armed with fresh webbing and a few specialist tools, you can restore that chair’s “bounce” and give new life to cherished heirlooms. Whether you’re a seasoned upholsterer or a weekend DIY enthusiast, this in-depth guide will walk you through every step—from choosing the correct webbing material to mastering the stretching tool—so you can reclaim that perfect, supportive seat.

What Materials and Tools Are Required to Stretch Upholstery Webbing?

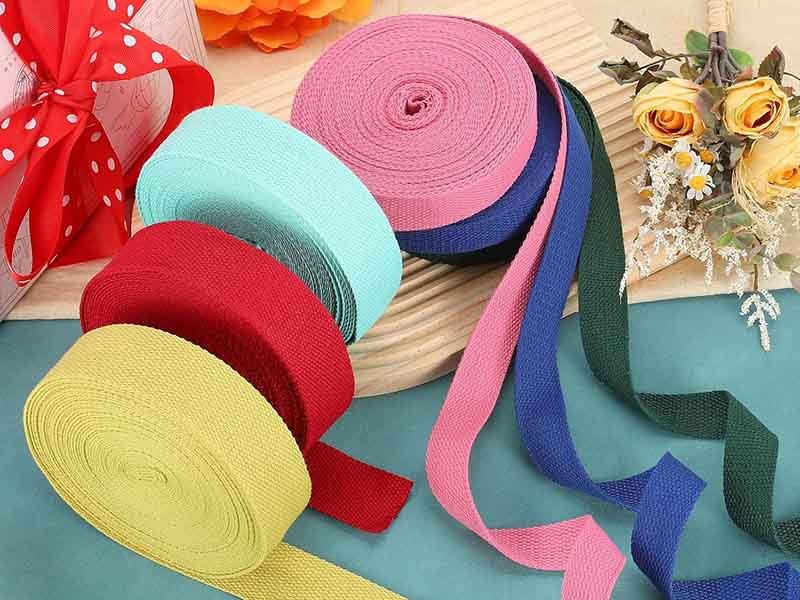
To stretch upholstery webbing, you need quality webbing material (jute, cotton, nylon, or elastic), a webbing stretcher (manual or ratchet), heavy-duty staples or tacks, a staple gun or tack hammer, scissors, and a measuring tape. Proper frame preparation and protective gloves round out the essentials.

Stretching upholstery webbing isn’t a “one-size-fits-all” process—selecting the right materials and tools is critical to achieving a taut, durable seat. Here’s an in-depth look:

  1. Webbing Material:
    • Jute Webbing: Natural fiber, budget-friendly, moderate stretch. Ideal for traditional chairs and vintage restorations.
    • Cotton Webbing: Softer feel, minimal stretch, often blended with synthetic fibers for durability.
    • Nylon Webbing: High tensile strength, low stretch under load, resists mildew—great for heavy-use furniture.
    • Elastic Webbing: Offers bounce and comfort but can sag over time; best for accent chairs or cushions needing extra give.
  2. Webbing Stretcher Options:
    • Manual Stretcher: Pliers-style clamps that grip and pull webbing; suitable for smaller projects but can be labor-intensive.
    • Ratchet Stretcher: Uses a ratchet mechanism for consistent, high tension across multiple strips quickly; preferred by professionals.
  3. Fastening Hardware:
    • Staples: Faster installation, strong hold; choose corrosion-resistant staples for outdoor or damp environments.
    • Tacks (Upholstery Nails): Lower profile than staples; blend seamlessly into wooden frames but require precise hammering.
  4. Additional Tools:
    • Heavy-Duty Scissors or Utility Knife: For clean, straight cuts.
    • Measuring Tape & Chalk or Pencil: Ensures uniform spacing and tension for each strip.
    • Protective Gloves: Prevent rope burns or blisters during manual stretching.

A well-prepared workstation with these essentials will streamline your upholstery project, reduce frustration, and maximize the life of your furniture.

Which Type of Webbing Stretcher Is Best for Upholstery Projects?

The best webbing stretcher depends on project scope: a ratchet stretcher offers high, uniform tension quickly for larger frames, while a manual stretcher is compact and budget-friendly for small chairs or spot repairs. Professionals favor ratchet models for consistency and speed.

Choosing between manual and ratchet webbing stretchers can make or break your upholstery workflow. Let’s compare them in detail:

Manual Webbing Stretcher (Pliers Style):

  • Pros:
    • Affordable and widely available
    • Compact footprint—easy to store
    • Precise control for delicate or narrow frames
  • Cons:
    • Labor-intensive—each strip requires sustained force by hand
    • Harder to achieve uniform tension across multiple strips
  • Applications: Small chairs, occasional spot repairs, hobbyists

Ratchet Stretcher:

  • Pros:
    • Delivers consistent tension with minimal effort
    • Adjustable ratchet clicks allow precise tension increments
    • Faster installation—ideal for 8+ strips per frame
  • Cons:
    • Higher upfront cost (typically $50–$150 USD)
    • Heavier and bulkier to transport
  • Applications: Sofas, sectionals, high-volume upholstery shops, heavy-duty furniture

Specialty Stretchers:

  • Pattern Webbing Stretcher: Designed for decorative jacquard or herringbone webbing; ensures pattern alignment under tension.
  • Corner Stretchers: Extra-long handles for awkward or deep frames, making tensioning at tight angles easier.
Table: Cost vs. Performance Comparison
Stretcher TypeCost Range (USD)Tension ConsistencyIdeal Project Size
Manual Pliers$15 – $35ModerateSmall frames
Ratchet$50 – $150HighMedium to large
Pattern / Corner Tool$60 – $120High (specialty)Decorative or tight

Professionals often invest in a mid-range ratchet stretcher for its blend of durability and performance. For occasional DIYers, a reliable manual stretcher paired with patience can still yield excellent results.

How Do You Prepare the Frame and Secure the First Strip of Webbing?

Begin by removing old webbing and cleaning the frame. Measure and mark equal spacing for the first strip, tuck it under the rail, then staple or tack it firmly while keeping it straight. This initial strip sets the foundation for uniform tension across all webbing.

A well-prepared frame ensures each subsequent webbing strip aligns perfectly and maintains tension over time. Follow these steps for a flawless start:

  1. Remove Old Webbing and Padding:
    • Gently pry out staples or tacks with pliers or a tack lifter.
    • Inspect frame for loose joints or wood damage; repair with wood glue or clamps if needed.
    • Clean frame surfaces with a cloth to remove dust and debris.
  2. Measure and Mark:
    • Determine the total width between side rails.
    • Divide by the number of strips plus one to get uniform spacing (e.g., for 10 strips, divide by 11).
    • Mark spacing on both rails using chalk or pencil for precise alignment.
  3. Cut and Position the First Strip:
    • Cut webbing about 6–8 inches longer than needed for weaving under and over rails.
    • Align one end flush with the outside edge, ensuring the webbing lies flat against the rail.
    • Use your measuring marks as guides to keep the strip perfectly centered.
  4. Secure with Staples or Tacks:
    • Staples: Position a staple at the center of the rail, drive it flush to the wood surface. Add two more staples, one on each side, to prevent twisting.
    • Tacks: For a cleaner aesthetic, hammer tacks equidistantly, ensuring the head sits snugly without denting wood.
  5. Test Initial Tension:
    • Before stretching, give the loose end a slight tug—if it stays firmly in place without shifting, you’re ready for the stretcher.
    • If it loosens, add an extra staple or tack to secure the anchor point.

By meticulously preparing the frame and setting the first strip, you create a stable “anchor” that ensures all following strips track straight and tension evenly, preventing sagging or puckering later.

How Do You Use a Traditional Webbing Stretcher to Achieve Even Tension?

Clamp the stretcher jaws onto the loose end of the webbing, hook the tool’s foot under the opposite rail, then pump the handle or ratchet mechanism until the webbing lies taut. Release carefully—avoiding sudden snap-back—and staple immediately to lock tension.

Mastering the webbing stretcher is crucial to achieving professional-grade upholstery. Here’s a step-by-step guide:

  1. Position the Stretcher:
    • Hook the stretcher’s foot under the far rail.
    • Engage the clamps on the free end of webbing near the frame. Ensure clamps bite the fabric securely.
  2. Apply Tension:
    • Manual Stretcher: Squeeze the handles repeatedly to pull webbing taut, using short, controlled strokes to inch it forward.
    • Ratchet Stretcher: Pump the ratchet lever; each click increases tension in small, consistent increments.
  3. Maintain Even Pull:
    • Observe webbing alignment as you stretch.
    • Adjust clamp position slightly if the webbing twists or bunches.
  4. Secure While Under Tension:
    • With the webbing held taut, have a partner or use a second set of hands to staple or tack the webbing quickly.
    • Place staples/tacks approx. ½ inch apart for maximum grip.
  5. Release the Tool Safely:
    • Manual: Gently open the jaws to avoid whipping the webbing.
    • Ratchet: Unlock the ratcheting mechanism slowly, maintaining a hand on the webbing to prevent recoil.
  6. Check and Repeat:
    • After fastening, tug the webbing lightly to confirm the hold.
    • Move 2–3 inches along the frame, then repeat the process for the next strip.
Common Pitfalls & Solutions
IssueCauseFix
Twisted WebbingClamp misalignedReposition clamp; smooth webbing before stretch
Inconsistent TensionRatchet lever skipped or manual dragReset tool; ensure lever fully engages
Webbing Snap-BackRapid tool releaseUnlock ratchet slowly; hold tension manually

By following these precise steps—positioning, tensioning, securing, and releasing—you ensure each strip of webbing is as taut and uniform as the last, providing a consistent support grid for upholstery cushions.

Do You Secure Webbing with Staples or Tacks, and When Should You Use Each?

Use galvanized staples for speed and strong hold—ideal for heavy-use furniture—while tacks provide a low-profile finish on fine wood frames. Staples are faster; tacks demand precision but yield a classic look. Choose based on frame material, aesthetic preference, and exposure to moisture.

The choice between staples and tacks affects both durability and appearance:

Staples:

  • Advantages:
    • Rapid installation with a pneumatic or manual staple gun
    • Greater holding power due to wider jaws
    • Best for heavy fabrics and synthetic webbing
  • Drawbacks:
    • Visible “feet” of staple may show if webbing shifts
    • Potential for wood splitting without pre-drilling

Tacks (Upholstery Nails):

  • Advantages:
    • Discreet, decorative heads available in brass, steel, or antique finishes
    • Customizable spacing creates visual patterns
  • Drawbacks:
    • Slower to install—each tack hammered individually
    • Less gripping area—may require more tacks for equal hold
When to Use Which?
ScenarioRecommended FastenerRationale
Outdoor or moisture-prone furnitureGalvanized staplesCorrosion-resistant, strong grip in damp climates
Antique or fine wood framesBrass tacksBlends with wood grain; preserves historical style
Heavy-duty commercial seatingStainless staplesMaximum hold for constant use
Decorative accent chairsDecorative tacksAdds visual flair at the edge

Best Practices for Both:

  • Pre-Drill for Tacks: For hardwood frames, drill pilot holes to prevent splitting.
  • Staple Depth Control: Use adjustable air pressure or hand tension to ensure staples don’t pierce through or remain loose.
  • Spacing: Keep fasteners within ½–1 inch of each other to distribute load evenly.

Selecting the right fastener and mastering its application will uphold the integrity of your webbing stretch and maintain the aesthetic quality of the furniture piece.

How Do You Troubleshoot Common Webbing Stretching Issues?

Slippage, uneven tension, and webbing damage are common. Fix slippage by adding extra fasteners or using reinforcing washers; correct uneven tension by re-stretching segments with the tool; replace frayed or over-stretched sections with fresh webbing to ensure consistent support.

Even experienced upholsterers encounter hiccups. Here’s how to identify and resolve them:

Webbing Slippage:

  • Symptom: Webbing shifts or loosens soon after stretcher removal.
  • Causes: Worn staples/tacks, insufficient fasteners, low webbing quality.
  • Solutions:
    • Add 1–2 extra staples adjacent to existing ones.
    • Use reinforcing washers beneath staples for synthetic webbing.
    • Switch to higher-grade webbing (nylon or blended cotton).

Uneven Tension Across Strips:

  • Symptom: Seat cushion dips or bulges in specific areas.
  • Causes: Inconsistent ratchet clicks, manual tool fatigue, frame irregularities.
  • Solutions:
    • Mark each ratchet click count to repeat tension uniformly.
    • Inspect frame for warping; shim or clamp to flatten rails.
    • Stretch central strips first, moving symmetrically to edges.

Over-Stretched or Damaged Webbing:

  • Symptom: Webbing threads break under load or appear thinning.
  • Causes: Excessive tension, material fatigue, UV exposure.
  • Solutions:
    • Replace with new strips cut to correct length—avoid tensioning beyond manufacturer’s rating.
    • Opt for UV-resistant nylon blends for outdoor furniture.
    • Incorporate a preventive maintenance schedule (see Section 8).

Tool Malfunctions:

  • Symptom: Ratchet skips, manual pliers slip.
  • Causes: Worn jaws, damaged ratchet teeth, lack of lubrication.
  • Solutions:
    • Clean and lubricate moving parts with light machine oil.
    • Replace worn clamps or upgrade to a higher-quality stretcher.
    • Test tension on scrap webbing before main project.

By systematically diagnosing the root cause—whether material, technique, or tool—you’ll avoid wasteful rework and ensure your upholstery job stands the test of time.

Is Jute, Cotton, Nylon, or Elastic Webbing Better for Your Upholstery Needs?

Jute offers cost-effective resilience, cotton brings softness, nylon delivers high strength with minimal stretch, and elastic adds comfort bounce. Choose based on usage: jute for traditional chairs, cotton blends for moderate use, nylon for heavy-duty seating, and elastic where compliance and slight give are desired.

Different webbing materials cater to diverse furniture demands:

  1. Jute Webbing:
    • Characteristics: Natural, biodegradable, moderate tensile strength (approx. 200–300 lbs).
    • Advantages: Eco-friendly, budget-friendly (~$0.50–$1.00/ft), traditional look.
    • Limitations: Prone to moisture damage, limited elasticity over time.
  2. Cotton & Blended Webbing:
    • Characteristics: Soft hand feel, tensile strength around 250–350 lbs, often blended with polyester.
    • Advantages: Gentle on cushions, less abrasive, easy to dye for matching upholstery.
    • Limitations: Can stretch slightly under load, may require periodic re-tensioning.
  3. Nylon Webbing:
    • Characteristics: Synthetic polymer, tensile strength up to 600 lbs, low stretch (<5%).
    • Advantages: Exceptional durability, UV and mildew resistant, ideal for high-traffic seating.
    • Limitations: Slightly higher cost (~$1.50–$3.00/ft), may feel less “traditional.”
  4. Elastic Webbing:
    • Characteristics: Woven rubber core, high elasticity, tensile strength ~150 lbs.
    • Advantages: Adds comfortable “give,” perfect for accent chairs and cushions requiring flex.
    • Limitations: Susceptible to over-stretching, loses elasticity over years, not load-bearing alone.
Use-Case Table
Furniture TypeRecommended WebbingKey Benefit
Antique Dining ChairsJutePeriod-authentic look
Family Room SofaNylonHeavy-duty resilience
Office Chair SeatingCotton BlendComfort with modest give
Patio Outdoor SeatingUV-resistant NylonWeatherproof longevity
Accent Lounge ChairsElastic + Cotton BlendEnhanced comfort bounce

Choosing the optimal webbing material ensures your upholstery not only looks great but also performs reliably for years to come.

How Can You Maintain Webbing Tension and Ensure Long-Term Durability?

Inspect webbing annually, retighten loose strips, replace damaged sections, and avoid overloading furniture. Keep upholstered pieces away from direct sunlight and moisture. For outdoor furniture, apply UV protectant sprays and store indoors during harsh weather to maximize webbing lifespan.

Long-term webbing performance hinges on proactive care:

  1. Regular Inspections:
    • Every 6–12 months, lift cushions and check for sagging or puckering.
    • Pinch webbing at staple points—if it moves, plan a maintenance session.
  2. Re-Tensioning Procedures:
    • Identify loose strips and restretch using the same ratchet or manual tool settings recorded initially.
    • Fasten new staples or tacks adjacent to old ones to avoid aged wood splitting.
  3. Environmental Protection:
    • Moisture Control: Upholstery in humid climates benefits from dehumidifiers or indoor storage.
    • UV Defense: Apply furniture-safe UV sprays to nylon webbing outdoors; position pieces in shaded areas.
  4. Weight Management:
    • Avoid placing excessive load—no more than manufacturer’s recommended weight capacity (often ~250–300 lbs per seat).
    • Discourage standing or heavy kneeling on webbed areas.
  5. Replacement Guidelines:
    • Over time (5–10 years depending on use), fully replace webbing if strands fray or elasticity drops below 80%.
    • Opt for professional re-webbing services from trusted suppliers like Szoneier for premium materials and precise installation.

By integrating routine checks, environmental safeguards, and mindful usage, you’ll extend the life of your upholstery webbing—keeping seats firm, supportive, and ready for daily enjoyment.

Ready to Stretch Upholstery Webbing with Precision?

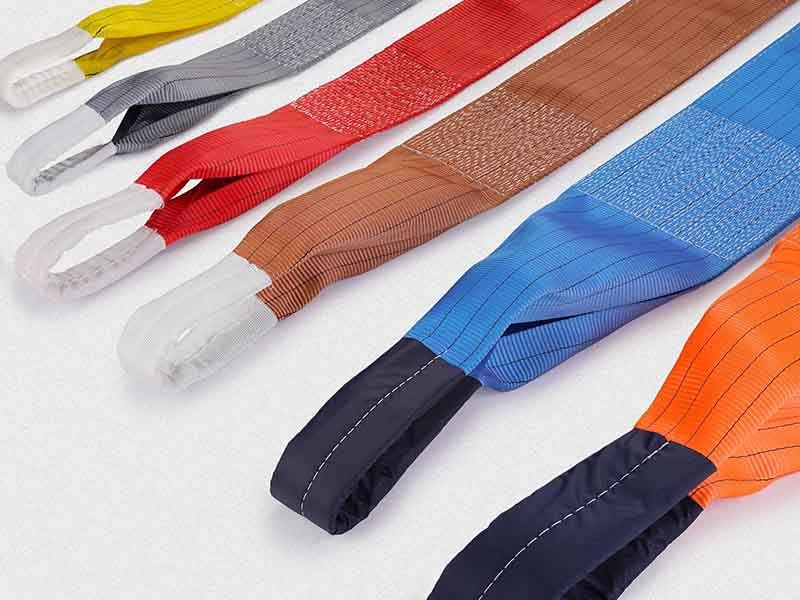
At Szoneier, we specialize in custom webbing solutions backed by 18+ years of R&D and manufacturing expertise. Whether you need nylon, polyester, PP, cotton, or decorative jacquard webbing, we deliver high-quality, low-MOQ customization with expedited sampling and 100% quality assurance.

Contact us today to request a quote and let our team design and produce the perfect webbing for your upholstery projects. Your customers deserve seats that look great and last—partner with Szoneier for precision-engineered support you can trust.

Make A Sample First?

If you have your own artwork, logo design files, or just an idea,please provide details about your project requirements, including preferred fabric, color, and customization options,we’re excited to assist you in bringing your bespoke bag designs to life through our sample production process.

Ask For A Quick Quote

Looking for premium custom webbing? Contact us now for competitive pricing, free samples, and expert consultation. Fill out the form below, and our team will get back to you within 24 hours!