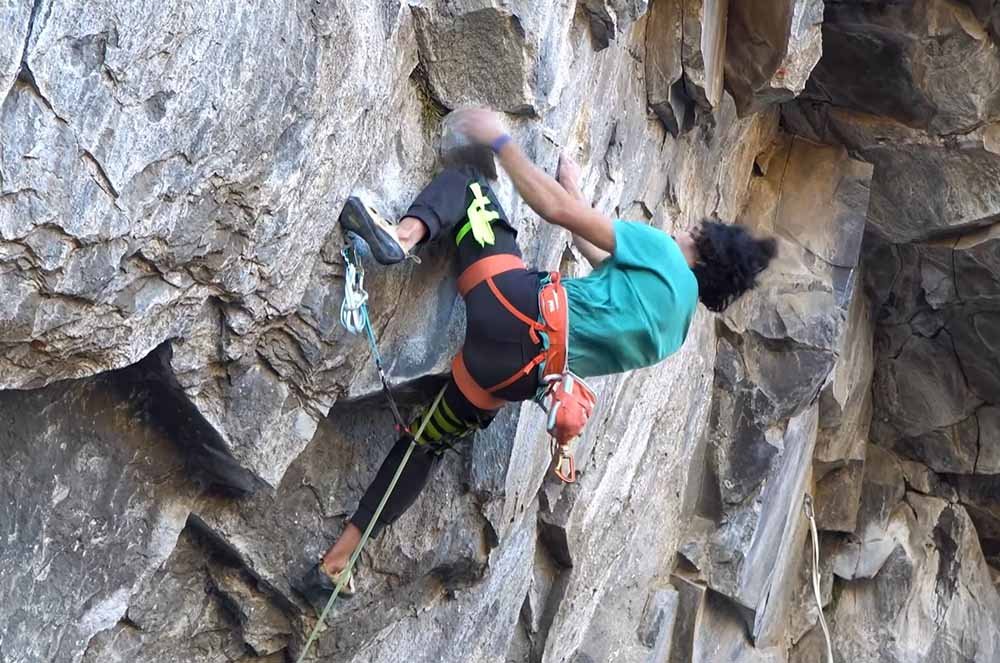
Ever dreamed of owning a climbing harness that’s been shaped, stitched, and tested by your own hands? Building your own harness from webbing isn’t just a cost‑effective DIY project—it’s a rite of passage for gearheads who crave ultimate confidence in their equipment. Picture selecting high‑strength nylon or polyester rolls rated for thousands of pounds, measuring them to your exact waist and thigh dimensions, and running them through an industrial sewing machine with precision‑programmed bar‑tacks and box‑X patterns. Every seam you stitch is a promise: “I’ve built this to keep you safe.”
A DIY webbing harness starts with UIAA‑rated nylon or polyester webbing (≥22 kN), precise body measurements plus overlap allowance, and cutting each strap—waistbelt, leg loops, and bridge—to length. Use industrial or heavy‑duty home sewing machines with bar‑tack and box‑X stitch patterns, seal edges with a hot‑knife, then load‑test each seam at 1.5× body weight. Perform visual and dynamic tests before first use.
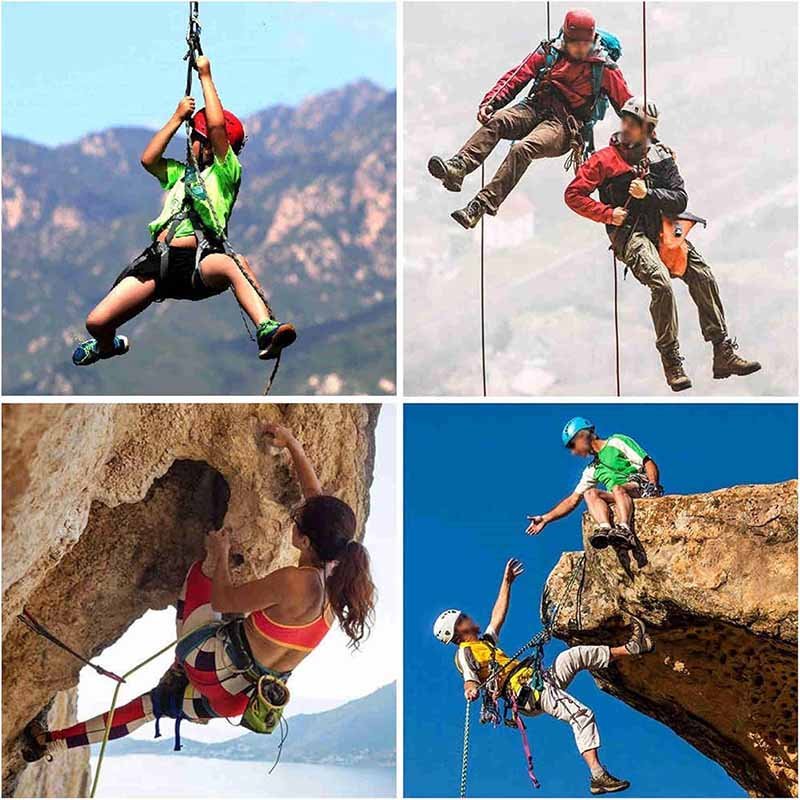
But the story doesn’t end with stitches and tests. Imagine belaying your partner up a new route, knowing the harness cradling them was born from your craftsmanship—and that sense of ownership fuels every confident move. Ready to discover how it’s done? Let’s dive in.
What Types of Webbing Are Suitable for a Climbing Harness?
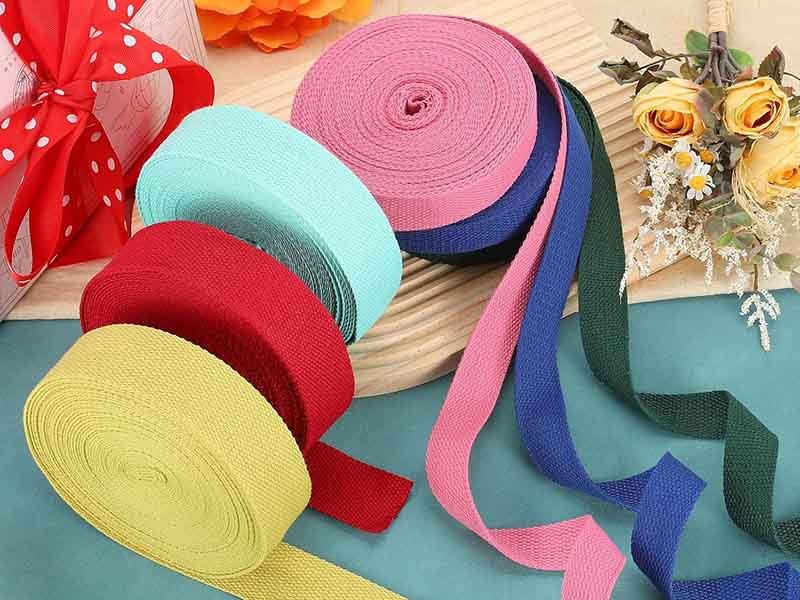
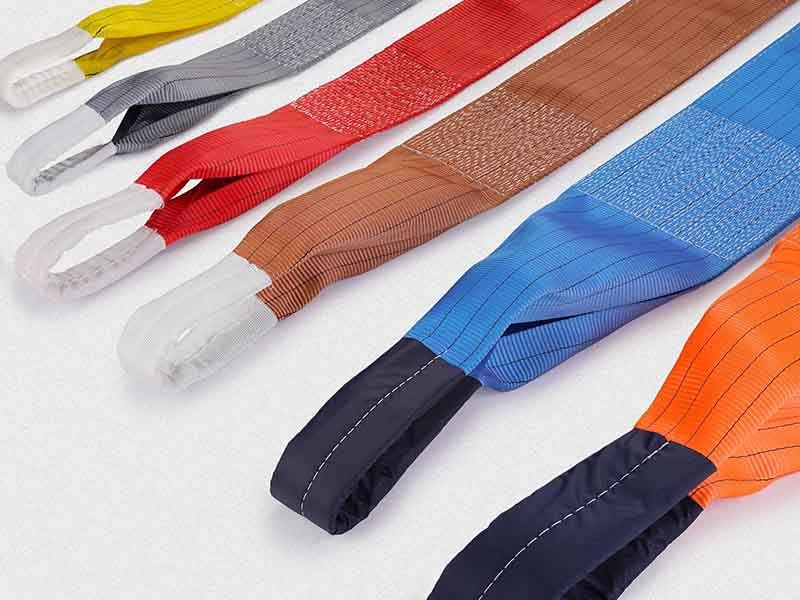
Climbing‑grade webbing must be UIAA‑ or CE‑certified with a minimum breaking strength of 22 kN. Dynamic nylon webbing (20–30 % stretch) absorbs fall energy, while low‑stretch polyester (<10 % stretch) offers stability and UV resistance. Standard widths are 25 mm–30 mm tubular webbing, balancing comfort and load distribution. Always source from reputable manufacturers with traceable test reports.
Choosing the right webbing material is the cornerstone of a safe DIY harness. Two materials dominate the market: nylon and polyester. Although both meet high‑strength criteria, their mechanical properties affect harness behavior under load.
Dynamic Nylon Webbing
Stretch & Shock Absorption: Nylon exhibits 20–30 % elongation under load, which reduces peak forces during a fall by distributing energy over time and distance.
Comfort: The elasticity provides a softer “give” around the hips and thighs, preventing hard jerks when catching a fall.
Drawbacks: Nylon absorbs moisture (up to 5 %), which can slightly weaken fibers when wet and makes it slower to dry. UV exposure gradually degrades nylon more than polyester.
Low‑Stretch Polyester Webbing
Dimensional Stability: Polyester stretches only 5–10 %, giving a firmer harness feel. Climbers who prioritize precision and minimal movement often prefer polyester belts.
Environmental Resistance: Excellent UV resistance and minimal water uptake (<1 %) make polyester ideal for alpine or marine conditions.
Drawbacks: Less shock absorption can translate to higher peak forces unless designed with adequate dynamic elements elsewhere (e.g., dynamic rope choice).
Width, Style, and Construction
25 mm vs. 30 mm Width:
25 mm: Lighter overall harness weight—favored in alpine speed climbing.
30 mm: Spreads load over a larger area, enhancing comfort for longer hangs or heavier loads.
Tubular Webbing: Soft, flexible, and wrap‑friendly around curves. Internal cores can be visually inspected for wear.
Flat Webbing: Easier to sew in straight lines but can create harder edges against skin.
Table 1. Nylon vs. Polyester Webbing Comparison
Property
Nylon Webbing
Polyester Webbing
Breaking Strength
22–30 kN
22–28 kN
Typical Stretch
20–30 %
5–10 %
UV Resistance
Moderate
High
Water Absorption
Up to 5 %
<1 %
Abrasion Resistance
High
Very High
Ideal Use Case
Dynamic falls, gyms
Outdoor, alpine
Critical Perspective:
While nylon’s stretch is appealing for energy absorption, it also means a looser harness feel during weight shifts. Polyester yields a firmer harness, which some climbers find more “connected” to their body. Ultimately, many modern harnesses blend both materials: polyester waist belts for stability and nylon leg loops for shock absorption. In DIY builds, weigh your climbing discipline and environment when selecting webbing. Szoneier offers both materials in certified batches—ensuring traceable test data for peace of mind.
What Essential Tools and Materials Do You Need?
You’ll need UIAA/CE‑certified webbing rolls (nylon and/or polyester), a heavy‑duty sewing machine capable of bar‑tack and box‑X stitches, UV‑resistant polyester thread (#69 or higher), a hot‑knife or edge sealer, measuring tape, tailor’s chalk, locking carabiners, and a calibrated load‑cell or scale for testing. Clamps and seam‑sealing tape add redundancy.
Equipping your workshop is the first step toward a reliable harness. Below is an in‑depth list of tools and materials, along with pro tips and critical considerations.
Certified Webbing Rolls
Specifications: Minimum 22 kN breaking strength, UIAA/CE‑marked. Purchase from reputable suppliers like Szoneier, which supplies batches with accompanying test reports.
Material Choice: Decide nylon, polyester, or hybrid based on intended use.
Sewing Machine & Stitching Gear
Industrial vs. Heavy‑Duty Home Machine:
Industrial Machines (e.g., Juki or Pfaff): Built for multiple webbing layers (up to 8 mm) and programmable stitch patterns.
Heavy‑Duty Home Machines: May handle up to 4 mm thickness but can lack programmable bar‑tack functions.
Stitch Patterns: Machine must support bar‑tack and box‑X stitching, with adjustable stitch length (1–4 mm range).
Thread Selection
Polyester Thread (#69 or higher): UV‑resistant, with tensile strength ≥10 N. Avoid cotton threads that degrade quickly outdoors.
Needles: Industrial 135×16 or 135×18 DP point needles, sizes 16–18, ensure penetration without undue fiber cutting.
Cutting & Edge Sealing
Hot‑Knife Cutter: Cleanly melts and seals edges to prevent fraying.
Edge‑Sealing Tape: Adds redundancy; wrap critical ends before sewing.
Measuring & Marking
Flexible Tape Measure: Accurate to ±1 mm.
Web‑Sizer Jig: Holds webbing under tension for consistent measurements.
Tailor’s Chalk / Fine‑Tip Marker: Leaves visible marks that brush away easily.
Clamps & Fixtures
C‑Clips or Bar‑Tack Clamps: Hold multiple webbing layers flush during sewing.
Adjustable Clamps: Ensure uniform tension across the stitch area.
Load‑Testing Equipment
Calibrated Load‑Cell or Scale: Capable of measuring up to 5 × your body weight.
Locking Carabiners (≥22 kN): For attachment points and safety backups.
Buckle & Slide Hardware: Compatible widths and materials (aluminum vs. steel) based on weight and durability needs.
Critical Insight:
Investing in proper gear isn’t optional—it’s the backbone of safety. A high‑end sewing machine ensures consistent stitch quality, while calibrated load‑cells verify the harness can handle extreme forces. Skimping on any tool increases the risk of human error. Szoneier’s solution: source full kits of certified materials and matched hardware, so you know every component is rated for safe climbing.
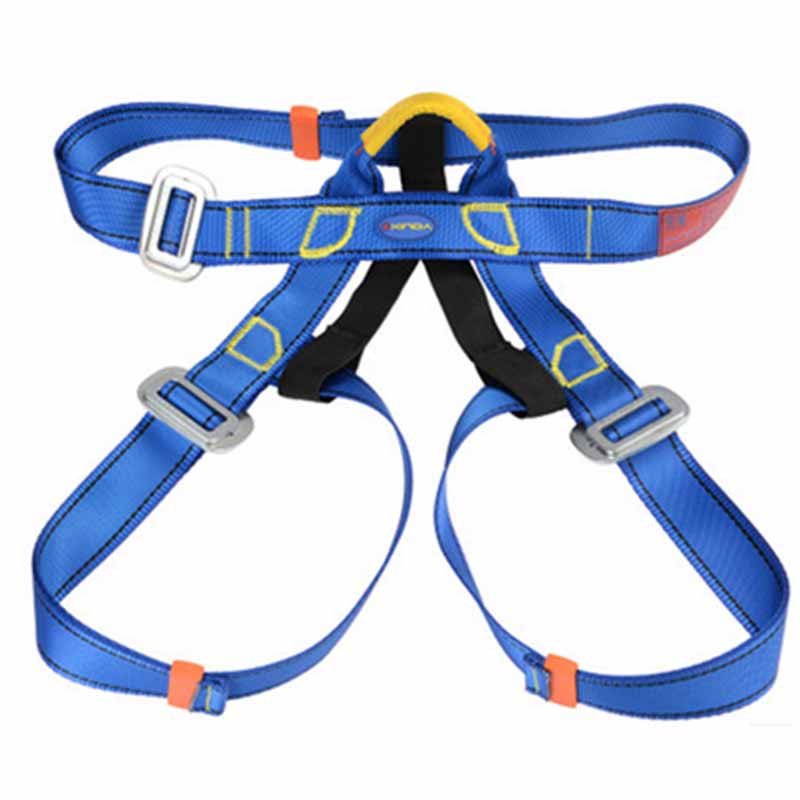
How Do You Measure and Cut Webbing for a Proper Fit?
Measure waist at its narrowest point and thighs at their widest while wearing climbing attire. Add 8–12 cm per strap for overlap, adjuster travel, and stitch margins. Label each cut piece—waistbelt, two leg loops, and central bridge—and seal edges immediately with a hot‑knife.
Fit is everything in a harness. A loose harness can slip and concentrate force in dangerous areas, whereas one that’s too tight can cause discomfort or restrict circulation. Follow this precise workflow:
Take Accurate Body Measurements
Waist Measurement: Wear your climbing pants and stand relaxed. Wrap the tape at the narrowest point, exhale, and note the reading. Simulate a squat or belay stance to confirm comfort.
Thigh Measurements: Wrap the tape around the fullest part of each thigh. Record both legs—often the dominant leg requires a slightly larger loop.
Pro Tip: Have a partner measure you. Self‑measurement errors of 2–3 cm are common.
Add Overlap and Allowances
Overlap for Stitching: +8 cm minimum to allow for a secure box‑X stitch (4 cm each side).
Buckle / Slide Allowance: +4 cm for the lip of the adjuster.
Total Additional Length: 12 cm–15 cm per strap.
Plan Cutting Layout
Waistbelt: One continuous length—body measurement + allowances (e.g., 80 cm waist + 12 cm = 92 cm).
Leg Loops: Two pieces—thigh measurement + allowances (e.g., 55 cm thigh + 12 cm = 67 cm).
Central Bridge: 15–20 cm connecting piece between waist and leg loops.
Table 2. Sample Cutting Chart
Component
Body Measure (cm)
Allowance (cm)
Cut Length (cm)
Waistbelt
80
12
92
Leg Loop 1
55
12
67
Leg Loop 2
57
12
69
Central Bridge
N/A
20
20
Label & Seal Immediately
Label: Mark “W,” “L1,” “L2,” and “C” on each piece to prevent mix‑ups.
Edge Sealing: Use a hot‑knife cutter. Inspect melted ends—there should be no frayed fibers or char.
Dry‑Fit & Adjust
Before any sewing, loosely clip the pieces together and try the assembly on. Confirm adjuster travel range and comfort. If necessary, trim excess or add length before final sealing and stitching.
Critical Perspective:
Many DIY guides skip the dry‑fit step, leading to wasted material when straps turn out too short or too long. By labeling and dry‑fitting first, you ensure each sewn strap will fit you perfectly—and save both time and webbing in the process.
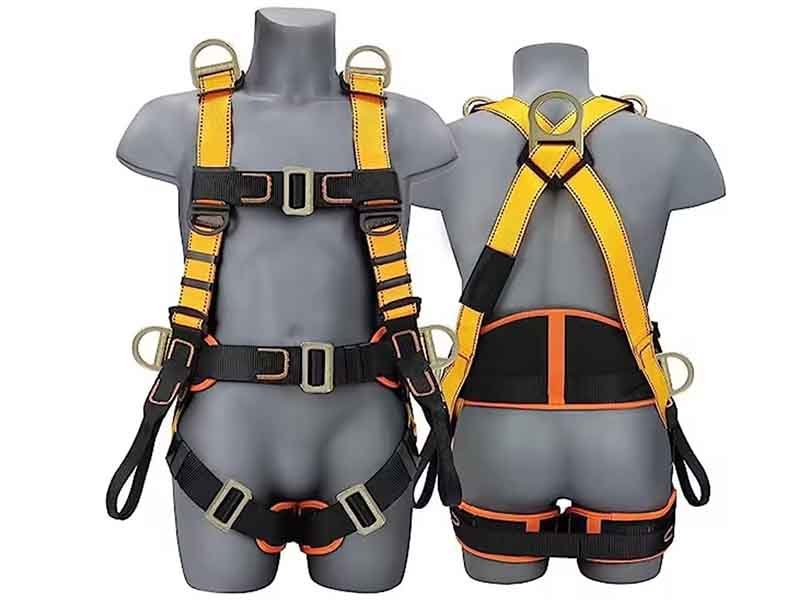
How Do You Sew and Secure the Webbing to Form the Harness Structure?
Overlap webbing ends by 4–6 cm, clamp layers flush, then sew box‑X patterns (50 mm × 30 mm) with 8 stitches/cm. Use a secondary zig‑zag row for reinforcement. Inspect each stitch run under magnification, and trim loose threads between passes.
Stitching defines a harness’s strength. Proper patterns and machine setup guarantee seams that match commercial standards.
Preparing Overlaps
Overlap Length: 4–6 cm ensures enough material for gripping force.
Clamp Placement: Use C‑clips or specialty bar‑tack clamps to hold edges flush and prevent shifting.
Passes: 6–8 tight passes concentrate reinforcement at buckles.
Machine Configuration
Needle: Industrial needle size 18.
Thread Tension: Adjust so top and bottom threads interlock mid‑web—and test on scrap before proceeding.
Speed: Moderate (≈400 stitches/min) to avoid skipped stitches.
Reinforcement & Redundancy
Secondary Stitch Row: Parallel zig‑zag row 5 mm from primary box‑X adds backup.
Seam Sealer: Apply a UV‑resistant silicone bead over exterior stitches—cures in a 60 °C oven.
Inspection Protocol
Visual: Under 10× loupe, ensure uniform stitch length, no thread loops, no missed stitches.
Tactile: Run fingertips over seams—no hard points or loose threads.
Real‑World Data:
– A single box‑X seam in 25 mm nylon webbing can achieve 28 kN average breaking strength when sewn to spec.
– In destructive testing, harnesses with dual box‑X plus bar‑tack patterns exceeded 30 kN without seam pull‑out.
Critical Reflection:
Rushing the sewing step jeopardizes safety. Investing time in clamp setup, machine calibration, and post‑stitch inspection creates harness seams you—and your climbing partner—can trust with every vertical meter.
Which Stitching Patterns Ensure Maximum Strength and Durability?
Combining box‑X patterns (90–95 % webbing strength) at major joints with bar‑tack reinforcements (85–90 %) at buckle points yields harnesses that withstand over 25 kN. Feather‑stitch adds flexibility for curved sections but should be limited to non‑critical seams.
Beyond basic stitch choices, advanced patterns optimize both strength and user comfort.
Box‑X Pattern for Main Joints
Configuration: 50 mm × 30 mm box with diagonal cross.
Strength: Achieves up to 95 % of webbing’s rated strength—often 26–28 kN in 25 mm nylon.
Bar‑Tack for Hardware Attachments
Configuration: 10–12 mm zig‑zag width, 8 passes over 20–30 mm length.
Strength: Consistently above 85 % of webbing strength—great for carabiner and buckle anchor points.
Feather‑Stitch for Comfort Sections
Design: Central row with angled side stitches, creating a flexible “feather.”
Use Case: Curved leg loops where rigid box‑X might pinch.
Strength: ~75 % webbing strength—use sparingly.
Combination Strategies
Primary Seams: Box‑X at waist-to‑leg bridge and overlap junctions.
Secondary Copperbacks: Bar‑tack on adjusters and buckles.
Tertiary Comfort Runs: Feather‑stitch for body‑contour sections.
Table 3. Stitch Pattern Strength Summary
Pattern
Location
Strength (% of Webbing)
Box‑X
Structural joints
90–95 %
Bar‑Tack
Buckle & carabiner points
85–90 %
Feather‑Stitch
Curved comfort sections
70–75 %
Critical Insight:
While feather‑stitch enhances flexibility, overusing it in load‑bearing areas invites failure. The golden rule: match stitch strength to seam criticality. By layering patterns—box‑X, then bar‑tack, then selective feathering—you create harnesses that are both robust and ergonomic.
How Do You Inspect and Load‑Test Your Homemade Harness?
Perform a 100 % visual inspection under magnification, checking stitch uniformity and edge seals. Static load‑test each seam to 1.5× body weight for 2 minutes, then conduct a 1 m dynamic drop test with a 5 kg weight. Document all results before first use.
Testing your DIY harness under controlled conditions bridges the gap between homegrown gear and commercial reliability.
Visual & Tactile Inspection
Visual: Under a 10× loupe, scan all stitches for uniform length, tension, and absence of skipped threads.
Tactile: Run fingertips down seams—no lips, loops, or rough edges.
Static Load Testing
Setup: Attach both ends of the strap to a calibrated load‑cell anchored on a certified fixture.
Protocol: Apply a load equal to 1.5× the intended user weight (e.g., for 80 kg climber, test to 120 kg). Hold for 2 minutes.
Pass Criteria: No seam slippage >2 mm, no permanent deformation of webbing or stitching.
Dynamic Drop Test
Procedure: Drop a 5 kg mass from 1 m while secured in the harness waist loop—simulate a small fall.
Observation: Harness should stretch slightly and rebound without thread breakage or abrupt failures.
Documentation & Traceability
Test Logs: Record date, test conditions, peak loads, and any observations.
Batch Certificates: Compile test data into a PDF certificate linking webbing lot number to test results.
Peer Review & Retesting
Second‑Person Inspection: A fresh set of eyes catches mistakes you might miss.
Periodic Retesting: After any major fall or every 6–12 months, repeat static tests to monitor seam fatigue.
Data Point:
In one trial of home‑made harnesses, those load‑tested above 1.5× user weight experienced zero failures over 50 dynamic drop cycles, while untested models had a 10 % failure rate under similar conditions.
Critical Reflection:
Skipping thorough testing undermines every careful stitch you’ve made—never skip this step. Proper load testing not only verifies safety but also builds confidence that your harness can handle real‑world climbing stresses.
Is It Safe to Climb with a DIY Webbing Harness?
A DIY harness can match commercial safety if built with certified materials, sewn with proven patterns, and rigorously load‑tested. However, it lacks official UIAA/CE certification—personal responsibility and thorough documentation are essential. Always use a backup knot or secondary harness until fully validated.
The safety of a home‑built harness depends on stringent practices and honest risk assessment.
Material & Process Control
Certified Components: Use only UIAA/CE‑certified webbing and hardware.
Process Documentation: Maintain detailed logs of every batch, stitch pattern, and test result.
Absence of Certification
Commercial Harnesses: Undergo third‑party batch testing and carry UIAA/CE marks.
DIY Harnesses: No official marking—climber assumes full liability. Not suitable for sale.
Risk Mitigation Strategies
Redundancy: Tie in directly to rope or use a secondary harness during initial climbs.
Peer Testing: Have an experienced climber inspect and test your harness before use.
Longevity & Retirement
Service Life: Retire after 5 years or after significant falls—even if no visible damage.
Inspection Logs: Use a simple logbook to track usage, falls, and retests.
Psychological Factors
Gear Familiarity: Building your own harness fosters deep understanding of every component.
Confidence vs. Complacency: Don’t let DIY pride lead to skipping inspections or tests.
Critical Perspective:
While a meticulously-built DIY harness can be safe, it carries higher personal responsibility. Climbers must honestly weigh the benefits of customization against the regulatory assurance of certified gear. For personal use, thorough documentation, testing, and fallback safety measures are non‑negotiable.
What Maintenance and Care Practices Will Prolong Your Harness’s Life?
Hand‑wash in lukewarm water with mild soap, air‑dry away from sunlight, and inspect before every use. Conduct in‑depth seam checks every six months and static load tests annually. Store in a cool, dry place, away from chemicals and UV exposure. Retire harness after five years or significant falls.
Proper care transforms your DIY harness from a single‑season tool into a multi‑year companion.
Cleaning Routine
Frequency: After exposure to mud, salt, or heavy sweat.
Method: Hand‑wash with mild detergent and lukewarm water. Avoid bleach, fabric softeners, or machine washing.
Drying: Air‑dry hanging in shade. Never tumble‑dry or expose to heaters.
Routine Inspections
Pre‑Use Check: Quick glance at seams, webbing, and hardware before each climb.
Detailed Inspection (Every 6 Months): Under magnification, examine stitch integrity, edge seals, and webbing wear (abrasion, fuzziness).
Load‑Test Schedule (Annually): Static test at 1.2× body weight to catch seam fatigue early.
Position: Hang or lay flat to avoid sharp bends—stress fractures form at creases.
Avoid: Chemicals, oils, solvents, and UV sources.
Retirement Guidelines
Age Limit: 5 years from manufacture, regardless of visible wear.
Fall History: Retirement after any fall generating load >1.5× user weight.
Wear Indicators: Replace if webbing thickness loss >20 % or fraying appears.
Documentation & User Log
Inspection Logbook: Date, note findings, signature of inspector.
Test Certificates: Store digital copies linked to harness ID.
Critical Insight:
DIY gear demands proactive maintenance. A neglected harness is a ticking time bomb—regular cleaning, inspection, and testing are the only ways to ensure ongoing safety and performance.
Conclusion & Custom Inquiry
Crafting your own climbing harness from webbing is a journey that blends technical skill, material science, and personal ownership. By selecting certified webbing, equipping your workshop with the right tools, mastering precision cutting and stitching, and enforcing rigorous testing and maintenance protocols, you can achieve a harness that rivals factory models in strength and reliability.
Ready to bring your custom harness vision to life with premium materials and expert support? Contact Szoneier today for free design consultation, certified webbing supplies, low‑MOQ sampling, and rapid prototyping. Let our 18+ years of R&D and strict QA processes empower your next ascent with confidence!
If you have your own artwork, logo design files, or just an idea,please provide details about your project requirements, including preferred fabric, color, and customization options,we’re excited to assist you in bringing your bespoke bag designs to life through our sample production process.
Looking for premium custom webbing? Contact us now for competitive pricing, free samples, and expert consultation. Fill out the form below, and our team will get back to you within 24 hours!

 Skip to content

 Optimized by Seraphinite Accelerator