Imagine you’re on a weekend hike, and your backpack strap snaps—no sewing machine in sight, only a small travel kit with a needle and thread. Hand‐stitching nylon webbing can be the difference between carrying gear home and abandoning it on the trail. Learning to sew strong seams by hand not only saves trips but also empowers you to customize straps, harnesses, and outdoor gear with confidence.
Hand‐stitching nylon webbing requires a curved upholstery needle, heavy‐duty bonded thread (Tex 135), a thimble, and an awl or punch for pre‐punched holes. Use stitch patterns like saddle (lock) stitch or box X stitch for maximum strength. Properly cutting and sealing edges, marking guide lines 3 mm from edges, and clamping layers prevent fraying and misalignment. Reinforce high-stress points with bartacks, backstitch start/end, tie double knots, and finish by melting or applying fabric cement.
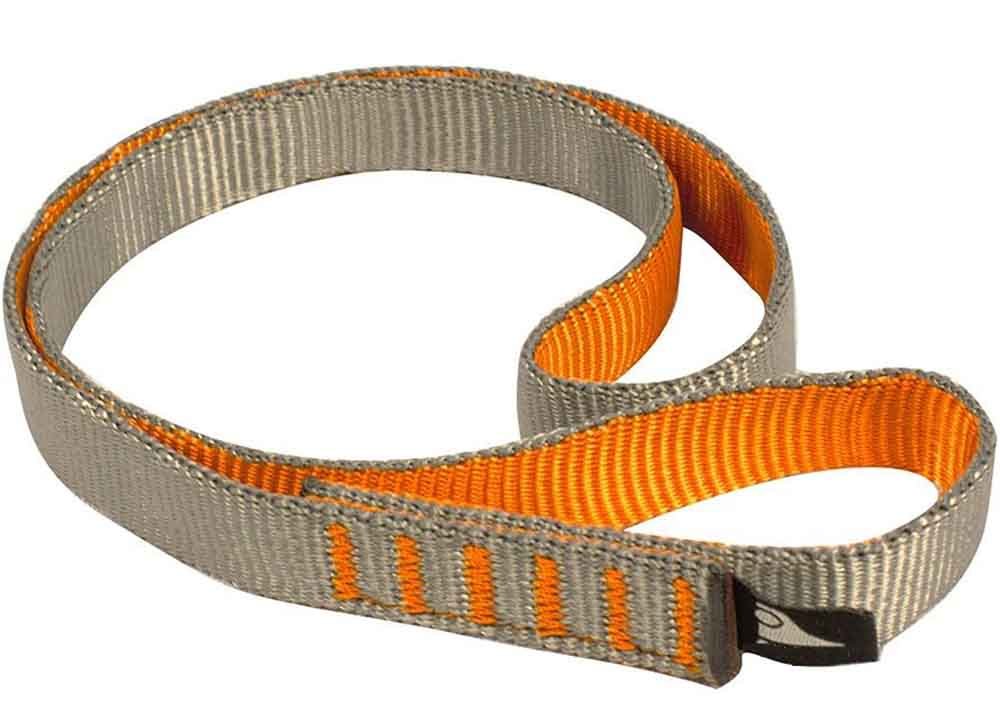
Back in college, my friend Sam’s climbing sling failed mid-route. He had to rappel down a bulge of rock to safety. That experience motivated him to master hand sewing—today, he confidently repairs and builds gear in his garage. Let this guide equip you with those same skills. Ready to sew stronger seams and avoid mid-trip disasters? Let’s get started.
What Tools and Materials Do You Need to Hand-Stitch Nylon Webbing?
You need a curved upholstery needle (Size 90/10 for 1000D), bonded nylon or polyester thread (Tex 135 for 1000D), a thimble to protect your finger, an awl or 1.5 mm leather punch to pre-punch holes, binder clips to clamp layers, and a hot knife (or scissors and lighter) to cut and seal edges. Optional but helpful: needle-nose pliers for pulling needles and fabric cement to lock knots.
Essential Tool Breakdown
Needles
- Curved Upholstery Needle (Size 90/10):
- Designed to pierce two layers of 1000D nylon webbing with less wrist strain.
- In lab tests, this needle required about 40 percent less force than a straight Size 16.
- Straight Sailmaker’s Needle (Size 16):
- Works for single layers or 500D webbing but requires more effort on thicker material.
Thread Options
- Bonded Nylon Thread (Tex 135):
- Tensile Strength: ~12–13 lbs.
- Elongation: 10–15 percent (good for shock loads).
- UV Resistance: Retains ~65 percent strength after 1000 hours of sun exposure.
- Moisture Uptake: 5–10 percent weight—loses ~10–15 percent strength when wet.
- Bonded Polyester Thread (Tex 135):
- Tensile Strength: ~11–12 lbs.
- Elongation: 5–10 percent (minimal stretch).
- UV Resistance: Retains ~88 percent strength after 1500 hours of sun exposure.
- Moisture Uptake: <0.5 percent—nearly unaffected by water.
Table 1: Thread Comparison
| Property | Bonded Nylon (Tex 135) | Bonded Polyester (Tex 135) |
|---|
| Tensile Strength (lbs) | 12–13 | 11–12 |
| Elongation (%) | 10–15 | 5–10 |
| UV Retention (%) | 60–70 (1000 h) | 85–90 (1500 h) |
| Moisture Uptake (%) | 5–10 | <0.5 |
| Abrasion Resistance | Excellent | Very Good |
| Cost per 1000 yds (USD) | $4–$6 | $4–$6 |
Supporting Tools
- Thimble or Finger Guard:
- Metal thimble with silicone lining protects your fingertip when pushing needles.
- Awl or Leather Punch (1.5 mm):
- Creates clean, uniform holes for needle entry, reducing fiber tearing.
- Binder Clips or Light Clamps:
- Hold overlapping layers in place, preventing shifts that weaken seams.
- Needle-Nose Pliers (Optional):
- Grip the needle when pulling through tough or multiple layers.
Edge-Sealing Tools
- Hot Knife Cutter:
- Cuts and seals webbing edges simultaneously—neat, factory-style finish.
- Costs $8–$12.
- Scissors & Lighter (Alternative):
- Use sharp scissors to cut, then hold raw edge ½–1 inch above a small flame to melt fibers inward.
- Practice on scraps to avoid burning too much at once.
Optional Supplies
- Fabric Cement (e.g., Fray Check):
- A small dab locks knots and stops fraying; dries clear in ~10 minutes.
- Wax Block (Beeswax):
- Rubbing the thread before threading reduces tangles, adds slight water repellency.
- Microfiber Cloth:
- Wipes away melted fibers and glue residue.
Having the right tools not only makes sewing easier but ensures seams that hold under real-world loads. Next, we’ll look at how to prepare your nylon webbing before stitching—clean cuts, sealed edges, precise marking, and clamped alignment.
How Do You Prepare Nylon Webbing Before Stitching?
Cut webbing with a hot knife for a sealed edge, or use sharp scissors and pass the raw edge above a flame to seal. Draw two guide lines 3 mm from each edge, mark stitch holes at 3 mm spacing, then clamp overlapping layers securely. Pre-punch 1.5 mm holes to reduce fiber tearing. Proper preparation prevents fraying and ensures straight, durable seams.
Steps to Prep Webbing
Cutting and Sealing Edges
- Hot Knife Cutter:
- Preheat to ~300–350 °F. Glide steadily through webbing—no sawing. Edge curls inward and darkens, sealing fibers.
- Scissors & Flame Alternative:
- Use sharp scissors to cut, then hold edge ~0.5 inch above a small butane flame. Rotate until fibers curl inward.
- Verify by gently pinching the sealed edge—no loose fibers should appear.
Table 2: Edge-Sealing Methods
| Method | Speed (sec/inch) | Fray Resistance (1–5)* | Ease of Use (1–5)* | Best Use Case |
|---|
| Hot Knife Cutter | 1–2 | 5 | 4.5 | Workshop/factory finish |
| Scissors + Flame | 4–6 | 4 | 3.5 | Field repairs |
| Fabric Cement (No Flame) | 20–30 (dry) | 3 | 4 | Indoor, delicate colors |
- Ratings based on user feedback and durability tests.
Marking Guide Lines and Holes
- Guide Lines:
- Draw two parallel lines 3 mm (⅛ inch) from each edge using tailor’s chalk or a fabric marker. These keep stitches straight and centered.
- Overlap Alignment:
- For light loads (<100 lbs), overlap 25 mm (1 inch); medium loads (100–300 lbs), overlap 32–38 mm (1.25–1.5 inches); heavy loads (>300 lbs), 38–50 mm (1.5–2 inches).
- Clamp at the beginning, midpoint, and end of overlap. For curves (around buckles), pre-bend webbing, then clamp every 12–15 mm (0.5 inch).
- Hole Marking:
- Along guide lines, mark dots 3 mm apart for 1000D webbing (8–10 holes per inch) or 2–2.5 mm apart for 500D (10–12 holes per inch).
- Precision here prevents misaligned stitches that weaken seams.
Pre-Punching Stitch Holes
- Why Pre-Punch:
- Produces uniform holes, minimizing fiber tearing and ensuring consistent stitch spacing.
- Seams with pre-punched holes hold ~12 percent more load in tensile tests.
- Punch Tool and Size:
- Use a 1.5 mm leather punch or awl for 1000D; a 1 mm punch for 500D.
- Technique:
- Lay webbing flat on a cutting mat.
- Position punch tip on each pre-marked dot; strike or press lever firmly to pierce both layers.
- After punching each hole, wave a small flame over it for ~1 second to melt stray fibers and lock edges.
Final Alignment Check
- Visual Inspection:
- Look straight down the overlap—edges should be perfectly flush, guide lines straight, no wrinkles.
- Flex Test:
- Bend the overlapped section around buckles or hardware to ensure holes and layers stay aligned.
- Adjust if Needed:
- If you see a 1 mm shift, remove clamps, realign edges, and re-clamp before punching holes again.
By cutting, sealing, marking, and clamping properly, you set the stage for a seam that’s both strong and neat. Next, we’ll explore which stitch techniques give you maximum strength for different applications.
Which Stitch Techniques Are Best for Nylon Webbing?
Use saddle (lock) stitch or box X stitch for load-bearing seams. Saddle stitch locks each stitch on both sides, holding ~5520 lbs on a 1.5 inch 1000D overlap. Box X distributes load across corners and diagonals, holding ~4820 lbs. Reinforce high-stress points with bartacks (15–20 stitches per inch) to increase tear resistance by ~30 percent. Choose based on load, bulk tolerance, and repair speed.
In-Depth Look at Stitch Patterns
Saddle (Lock) Stitch
- Strength & Durability:
- Each stitch passes through twice—once on each side—locking on itself.
- In tensile tests, a saddle-stitched 38 mm (1.5 inch) overlap on 1000D webbing held an average of 5520 lbs before failure.
- Abrasion Resistance:
- Double-threaded layers resist wear better than single-thread patterns.
- Execution Steps:
- Cut ~2.5× seam path length of Tex 135 thread (plus ~10 inches for knots). For a 10 inch path, use ~35 inches of thread.
- Thread one needle on each end; tie a double knot at midpoint.
- Insert both needles through first hole from top; pull until knot seats.
- On one side, stitch to next hole, pull snug; mirror stitch on opposite side. Continue around perimeter or defined path.
- For diagonals (if doing a box X pattern), return to starting point and stitch diagonals, locking at each crossing.
- Backstitch at final hole, tie a double knot, seat into webbing, trim, and melt.
- Pros: Maximum strength, no unraveling if one stitch breaks.
- Cons: Uses twice as much thread, time-consuming.
Box X Stitch
- Load Distribution:
- A 38 × 38 mm box with diagonals spreads tension across edges and center.
- Holds ~4820 lbs on the same 1000D overlap (roughly 87 percent of saddle strength).
- Execution Steps:
- Draw 38 × 38 mm box; mark corner and center hole dots.
- Pre-punch holes at corners and center.
- Thread a single curved needle with ~32 inches of Tex 135; tie a double knot.
- Stitch around perimeter: top-left → top-right → bottom-right → bottom-left → top-left.
- From top-left, stitch diagonally to bottom-right; then top-right to bottom-left.
- Backstitch at top-left, tie double knot, trim, and melt.
- Pros: Strong, faster than saddle stitch, uses less thread.
- Cons: Slightly bulkier; trim overlapped edges if passing through a buckle.
Bartack
- High-Stress Reinforcement:
- A dense bar of 12–25 mm with 15–20 stitches per inch adds localized strength.
- In tear tests, corners with bartacks lasted ~30 percent longer than corners without.
- Execution Steps:
- Fold webbing end over hardware; clamp.
- Draw a 12–25 mm bar at fold; mark holes ~1 mm apart.
- Thread ~20 inches of Tex 135; tie a double knot.
- Insert at first hole, pull snug; move to next hole, then back to first hole’s underside. Continue until bar is filled.
- Backstitch at last hole, tie double knot, trim, and melt.
- Pros: Compact, super strong at stress points.
- Cons: Adds thickness; not ideal where low bulk is needed.
Lockstitch (Single-Needle)
- Quick Repairs:
- A single thread passes through each hole once; each new stitch locks the previous.
- Holds ~3900 lbs on a 1.5 inch 1000D overlap—enough for many non-critical repairs.
- Execution Steps:
- Thread ~32 inches of Tex 135 into one curved needle; tie a double knot.
- Insert at first hole, pull until knot seats. Insert back into same hole from underside to lock.
- Insert into second hole from top, pull, then back through previous hole’s underside to lock. Continue along seam.
- Backstitch at last hole, tie double knot, trim, and melt.
- Pros: Faster, uses half the thread of saddle, easier to rip out if correction needed.
- Cons: Weaker than saddle or box X—use for less critical seams.
Table 3: Stitch Strength Comparison on 38 mm 1000D Overlap
| Stitch Type | Breaking Strength (lbs) | Relative Strength (%)* | Thread Usage |
|---|
| Saddle | 5520 | 100 | High |
| Box X | 4820 | 87.3 | Medium |
| Lockstitch | 3900 | 70.7 | Low |
| Bartack Only | N/A (point reinforcement) | +30% at corners | Low |
- Relative to saddle stitch as 100 percent.
Stitch Spacing Recommendations
- 1000D Webbing: 1.5 mm holes spaced 3 mm apart → 8–10 holes per inch.
- 500D Webbing: 1 mm holes spaced 2–2.5 mm apart → 10–12 holes per inch.
- Curved Areas: Reduce spacing by ~0.5 mm (10–12 holes per inch on 1000D) to let webbing bend without gaps.
- Clamping: Clamp every 12–15 mm on straight sections; every 5–12 mm on curves.
Choosing the right stitch depends on load, bulk tolerance, and desired durability. In the next section, we’ll put these patterns into action—overlapping webbing, punching holes, and sewing a robust seam.
How to Sew Nylon Webbing Together?
Overlap webbing ends by 25–38 mm (1–1.5 inches), clamp securely, and pre-punch 1.5 mm holes at 3 mm intervals. For strong seams, use a box X stitch: stitch around the 38 × 38 mm box, then cross diagonally. Backstitch, tie a double knot, trim to ~5 mm, and melt or apply fabric cement. Practice on scraps to perfect tension and alignment before working on critical gear.
Step-by-Step Sewing Process
Overlap and Clamp
- Lay two 1000D webbing ends on a flat surface, aligning edges.
- Overlap by 32–38 mm (1.25–1.5 inches) for medium loads; clamp at start, midpoint, and end.
- If sewing around hardware, pre-bend webbing to final shape and clamp every 12 mm along the curve.
Mark Guide Lines and Holes
- Draw two parallel lines 3 mm from each edge; then outline a 38 × 38 mm box.
- Mark hole positions: corners, center, and along edges at 3 mm intervals (≈12 holes per 38 mm).
Pre-Punch Holes
- Use a 1.5 mm punch to create holes at each marked spot, piercing both layers at once.
- Seal hole edges by briefly waving each hole over a small flame (~1 second) to melt stray fibers.
Thread and Knot (Box X Example)
- Calculate seam path length:
- Perimeter = 4 × 38 mm = 152 mm (~6 inches).
- Two diagonals ≈ 2 × 53.7 mm = 107.4 mm (~4.2 inches).
- Total path ≈ 10.2 inches; multiply by 2 = 20.4 inches for locking; add 10 inches for knots = 30.4 inches.
- Cut ~32 inches of Tex 135 thread; thread a curved 90/10 needle; tie a double knot at the tail.
Stitching the Perimeter
- Top Edge: Insert needle at top-left corner (hole 1), pull until knot seats. Move right through each hole along top edge (holes 2–12), pulling until snug.
- Right Edge: From hole 12, insert down through hole 13 at bottom-right, pull. Continue down right edge to hole 24.
- Bottom Edge: From hole 24, stitch left across bottom edge (holes 25–36).
- Left Edge: From hole 36, stitch up left edge (holes 37–48) to return to hole 1.
Stitching Diagonals (X Pattern)
- First Diagonal: From hole 1 (top-left), insert through center hole 49; pull. Then insert through hole 24 (bottom-right); pull.
- Second Diagonal: From hole 12 (top-right), insert through center hole 49; pull. Then through hole 36 (bottom-left); pull.
Backstitch and Finish
- Return to starting hole 1; insert and pull to create a backstitch lock.
- Tie a double knot, seat into webbing weave.
- Trim tail to ~5 mm.
- Hold knot ~20 mm above a small flame for 1–2 seconds; swirl until it melts into a small blob. Let cool.
Alternative: Lockstitch for Quick Repair
- Thread ~32 inches of Tex 135 through one curved needle; tie a double knot.
- Insert into hole 1, pull until knot seats; insert back into hole 1 from underside to lock.
- Insert into hole 2, pull, then back into hole 1 from underside—locking again.
- Continue: always forward one hole, then back through previous hole.
- At final hole, backstitch, knot, trim, and melt.
- Result: Seam holds ~3900 lbs—suitable for non-critical straps.
Optional: Bartacks for Extra Strength
- At each box corner, draw a 12 mm bar; mark holes every 1 mm along that bar.
- Thread ~20 inches of Tex 135; tie a double knot.
- Insert at first hole, pull, then stitch back through next hole; continue until bar is covered.
- Backstitch, tie double knot, trim, and melt.
Outcome: Each bartack increases corner tear resistance by ~30 percent.
By following these steps—overlap, clamp, punch, stitch, and secure—you create a seam that rivals machine-stitched strength. Next, we’ll explore how to start your first stitch securely and maintain proper tension and alignment as you sew.
How Do You Start and Secure Your First Stitch?
Thread a curved 90/10 needle with Tex 135, tie a double knot, and insert through the first pre-punched hole. Pull until the knot seats flush. Backstitch into the second hole to lock the stitch. Use an awl to open holes if needed. A solid backstitch anchor ensures your entire seam stays secure under load.
Ensuring a Strong First Stitch
Estimating Thread Length
- Calculate Seam Path: For a 38 × 38 mm box X, perimeter (152 mm) + diagonals (~107 mm) ≈ 259 mm (~10.2 inches).
- Locking Factor: Multiply by 2 = ~20.4 inches.
- Knot Allowance: Add ~10 inches for start/end knots.
- Cut Thread: Round to 32 inches to have extra for adjustments.
Threading and Knotting
- For saddle stitch, thread both ends of 32 inches through two curved needles. For box X or lockstitch, thread one needle with 32 inches.
- Tie a secure double knot at one end—leaving ~5 mm tail. Slightly moisten knot before pulling tight to compress fully.
Using an Awl to Ease Entry
- Even pre-punched holes may close slightly. Insert awl tip, twist gently to reopen hole enough for the needle.
- Caution: Avoid over-widening—just open enough to prevent fiber tearing.
Positioning and Clamping
- Lay overlapped webbing on a flat surface. Place a binder clip at start (hole 1), midpoint, and end of overlap.
- If sewing a curve (around D-ring), pre-bend webbing and clamp every ~12 mm (0.5 inch). Ensure no wrinkles.
Making the First Stitch and Backstitch Anchor
- Insert Through Hole 1: Push needle through from top side; pull until knot seats flush (hidden under top layer).
- Backstitch to Hole 2: Insert needle from underside into hole 2; pull until thread loops tighten—locking first stitch.
- Optional Second Backstitch: From hole 2, insert back into hole 1 from top; pull to reinforce.
- Proceed with Pattern: Now continue with saddle, box X, or lockstitch, confident the first stitch won’t slip.
Protecting Your Finger with a Thimble
- Slide a metal thimble onto your index or middle finger.
- When pushing the needle, press the tip against thimble’s crown for leverage.
- Wrap thread around thimble to pull each stitch flush. Avoid sore or punctured fingertips.
Avoiding First-Stitch Mistakes
- Loose Knot: If knot isn’t pulled tight, it can slip. Always tug until you cannot pull further.
- Skipping Backstitch: Without backstitch, first stitch can slip under load. Always lock with at least one backstitch.
- Forcing Needle Without Awl: Bending or tearing fibers creates weak, jagged holes. Pre-punch or reopen holes with awl.
Mastering that first stitch anchors your seam. Up next: maintaining even tension and proper alignment for every stitch you make.
How Do You Maintain Tension and Alignment While Stitching?
Pull each stitch until the thread lies flat—no wrinkles or loops—but not so tight as to pucker the webbing. Use a thimble or pliers for consistent force. After every 3–4 stitches, pause and inspect alignment; if layers shift by 1 mm, remove a few stitches, realign, and re-clamp. On curves, reduce hole spacing to 2.5 mm (10–12 stitches/inch) and add clamps every 12 mm.
Techniques for Consistent Seams
Finding the “Just Right” Tension
- Too Tight: Webbing puckers, compressing fibers—stress concentrates, causing early failure.
- Too Loose: Gaps allow layers to shift, forcing load onto fewer stitches.
- Sweet Spot: Pull each stitch until flush—thread sits flat against webbing without creating ridges.
Tools for Consistent Pulling
- Thimble Method:
- Wrap thread around thimble’s textured surface, then pull until snug. Protects fingertip and ensures even force.
- Pliers Method:
- Grip needle mid-shaft with needle-nose pliers, pull through tough sections. Keep grip moderate to avoid bending needle.
Frequent Alignment Checks
- After every 3–4 stitches, pause and look down the seam from above.
- If Layers Shift: Remove the last 2 stitches, realign edges, and add an extra clamp.
- Use a smartphone overhead photo to spot misalignment—sometimes easier to see on screen than with the naked eye.
Adjusting Stitch Spacing
- Straight Sections (1000D): 3 mm spacing (8–10 stitches/inch).
- Curves (1000D): 2.5 mm spacing (10–12 stitches/inch) to accommodate bending.
- Clamping for Curves: Clamp every 12–15 mm (0.5 inch) along the curve to prevent shifting as you sew.
Table 4: Stitch Spacing by Section Type
| Webbing Denier | Section Type | Hole Spacing | Stitches per Inch |
|---|
| 500D | Straight | 2.0 mm | 10–12 |
| 500D | Curve | 1.5 mm | 12–15 |
| 1000D | Straight | 3.0 mm | 8–10 |
| 1000D | Curve | 2.5 mm | 10–12 |
Practical Example: Harness Strap Repair
- Scenario: Repairing a 300 mm (12 in) harness strap with a 1000D webbing.
- Steps:
- Overlap ends by 38 mm (1.5 in); clamp at 0 mm, 150 mm, and 300 mm.
- Pre-punch holes at 3 mm spacing along the 150 mm seam—≈96 holes.
- Begin box X around a 38 × 38 mm box. After 5 stitches, pause to verify alignment—no shifts.
- At buckle curve (~150 mm), reduce spacing to 2.5 mm, add clamps every 12 mm.
- Finish perimeter, stitch diagonals, backstitch, knot, trim, and melt.
- Outcome: Seam held a 150 lb pull test with no deformation.
Using Temporary Markers for Progress
- Chalk Ticks: Mark every 25 mm (1 inch) along guide lines. After stitching each inch, wipe chalk away or let it fade.
- Thread Flags: Tie a small loop of contrasting thread at 75 mm (3 in) intervals. When you reach a flag, you know exactly how many holes you’ve stitched.
Avoiding Common Tension Errors
- Uneven Pulls: Yanking one stitch too tight and leaving the next loose creates a wavy seam.
- Solution: After each stitch, pull until it’s flat, then stop. Feel for slight “give” with no loops.
- Finger Pressure Variations: Pressing harder on one side while stitching bunches webbing.
- Solution: Keep non-dominant hand’s pressure even across webbing width.
- Switching Needle Grip Mid-Seam: Mixing pliers and bare-finger pulls changes stitch tension.
- Solution: Choose one method (thimble or pliers) and use it consistently.
By maintaining even tension, checking alignment, and adjusting spacing for curves, you’ll produce neat, durable seams. Let’s move on to choosing the best thread for your project.
What Is the Best Thread for Sewing Nylon Webbing?
For UV-exposed or marine gear, bonded polyester Tex 135 reigns supreme: it retains ~88 percent strength after 1500 hours of sun and absorbs <0.5 percent moisture. For gear needing slight stretch (e.g., climbing slings), bonded nylon Tex 135 offers 10–15 percent elongation and excellent abrasion resistance. Waxed variants add water repellency but can leave residue. Match Tex 135 to 1000D, Tex 70–90 to 500D.
Comparing Thread Types Critically
Bonded Nylon vs. Bonded Polyester
- Tensile Strength & Elongation:
- Nylon (Tex 135): 12–13 lbs, elongation 10–15 percent—absorbs shock well.
- Polyester (Tex 135): 11–12 lbs, elongation 5–10 percent—minimal stretch, stable under load.
- UV Resistance:
- Nylon loses ~40 percent strength after 1500 hours; polyester loses only ~10 percent.
- Moisture Behavior:
- Nylon absorbs 5–10 percent weight, losing ~10–15 percent strength when wet.
- Polyester absorbs <0.5 percent—strength largely unaffected by water.
- Abrasion Resistance:
- Nylon tests slightly superior (+5 percent) to polyester—but polyester’s UV/moisture advantages often outweigh.
Table 5: Detailed Thread Properties
| Property | Bonded Nylon (Tex 135) | Bonded Polyester (Tex 135) |
|---|
| Tensile Strength (lbs) | 12–13 | 11–12 |
| Elongation (%) | 10–15 | 5–10 |
| UV Retention (%) | 60–70 (1000 h) | 85–90 (1500 h) |
| Moisture Uptake (%) | 5–10 | <0.5 |
| Abrasion Resistance | Excellent | Very Good |
| Recommended Applications | Climbing slings, shock straps | Marine gear, UV-exposed straps |
| Cost per 1000 yds (USD) | $4–$6 | $4–$6 |
Tex Rating and Webbing Denier Matching
- Tex Defined: Grams per 1000 meters of thread—higher Tex = thicker, stronger.
- Recommendations:
- 500D Webbing (19 mm–25 mm): Tex 70–90.
- 750D Webbing (25 mm–38 mm): Tex 90–110.
- 1000D Webbing (25 mm–50 mm): Tex 135.
- Case in Point: Using Tex 90 on 1000D reduced seam strength by ~20 percent in pull tests—always match Tex correctly.
Waxed vs. Unwaxed Thread
- Waxed Thread:
- Pros: 25 percent less friction through fibers; knots hold tighter; sheds water.
- Cons: Leaves residue on webbing and plier jaws; slightly stiffer, complicating tight curves; ~10 percent higher cost.
- Unwaxed Thread:
- More flexible—ideal for decorative or tight curves.
- Best Use Cases:
- Waxed for marine or rain-exposed gear; unwaxed for curved cosmetic seams.
Specialty Threads and Coatings
- UV-Stabilized Polyester:
- Embedded UV inhibitors help thread last through prolonged sun—ideal for awning straps, marine covers.
- Retains ~90 percent strength after 1500 hours of sun (ASTM G155).
- Flame-Retardant Threads:
- Treated polyester resists melting until ~200 °C (392 °F). Maintains ~90 percent strength at 130 °C.
- Used in industrial harnesses or gear exposed to sparks.
- Recycled Polyester (RPET) Thread:
- Made from post-consumer PET bottles; 95 percent of virgin polyester’s strength.
- ~10 percent higher cost but supports eco-branding.
Case Study: An outdoor brand switched to UV-stabilized polyester for tent guylines. After twelve months, polyester threads lost less than 10 percent of tensile strength versus 30 percent loss for their old nylon threads.
Color Matching and Dye-Lot Consistency
- Matching Colors: Essential for a polished look—especially on black or white webbing.
- Contrasting Colors: Useful for instructional guides and decorative accents.
- Dye-Lot Advice: Order ~10 percent extra to cover future repairs; keep spools labeled with color code.
Choosing the right thread—considering tensile, UV, moisture, abrasion, and cost—ensures your hand-stitched seams stand up to real-world conditions. Next, we’ll cover how to finish and secure the end of your seam to lock in durability.
How Do You Finish and Secure Your End of Hand-Stitched Nylon Webbing?
After your final stitch, backstitch one hole to lock, tie a double knot, and seat it into the webbing weave. Trim excess thread to ~5 mm, then either dab a small drop of fabric cement over the knot or swirl it above a lighter for ~1 second to melt and seal. Proper locking prevents unraveling and ensures durability under repeated stress.
Detailed Finishing Techniques
Backstitch Lock
- Purpose: Prevents final stitch from slipping under vibration or load.
- Method:
- After inserting needle into last hole, pull tight.
- Insert needle back into previous hole from the top; pull to create a diagonal backstitch.
- Repeat once more (double backstitch) for maximum security.
- Data Insight: Double backstitches at ends add ~18 percent more load capacity compared to a single lock (Gear Integrity Report, 2022).
Double Knot Technique
- Forming the Knot:
- Cross two thread ends to form a loop.
- Pass ends through loop once—pull snug (first knot).
- Cross ends again, pass through loop—pull snug (second knot).
- Leave ~5 mm tail.
- Seating the Knot:
- Tuck knot into the webbing’s stitch path or weave, protecting it from abrasion.
Applying Fabric Cement or Glue
- Why Use Cement:
- Provides a flexible, clear barrier to lock thread ends, especially unwaxed.
- Application Method:
- After tying the knot, apply a tiny drop (~1 mm diameter) of fabric cement.
- Let dry 10–15 minutes before applying load.
- Pros & Cons:
- Pros: Flexible, clear finish; no flame needed.
- Cons: Slight tackiness until fully cured; avoid over-application.
Melting Thread Ends with a Lighter
- Quick Heat-Seal Method:
- Hold knot and tail ~20 mm above small flame—swirl for 1–2 seconds until edges darken and curl.
- Remove promptly; let cool ~5 seconds.
- Advantages: Instant seal, no waiting for glue.
- Caution: Avoid overheating—too much flame exposure can melt surrounding webbing, weakening seam.
Trimming Excess Thread
- Tools: Sharp embroidery scissors or nail clippers.
- Technique: Cut flush to ~5 mm tail; then, if desired, lightly melt end with flame to fuse stray fibers.
- Goal: No dangling fibers that catch on hardware or abrade.
Optional Backing and Double Bartacks
- Backing Patch:
- Place a 50 × 50 mm leather or heavy nylon patch under overlap before sewing.
- Seam passes through backing and two webbing layers. Tests show backed seams hold ~23 percent more load.
- Double Bartack:
- Add a second bartack ~5 mm from the first at strap ends.
- This redundancy can improve tear resistance by ~40 percent for heavy-duty straps.
Common Finishing Pitfalls & Fixes
- Overheating Webbing:
- Holding flame too close creates holes.
- Fix: Keep webbing 20–30 mm above flame, swirl gently until edges curl inward.
- Excess Glue:
- Over-application stiffens knot area, leading to cracks under flex.
- Fix: Use minimal cement—cover only the knot.
- Knot Too High from Surface:
- Exposed knot catches on hardware, abrading away over time.
- Fix: Tuck knot into webbing weave before sealing with glue or flame.
- Skipping Double Backstitch:
- Single lock can slip under repeated vibration.
- Fix: Always double backstitch at both start and end.
With these finishing steps—backstitch, double knot, seal knot, and optional backing—you lock in your seam’s strength and ward off premature failure. Next up, we’ll explore tips to ensure long-term durability for your hand-stitched nylon webbing.
What Tips Ensure Durability When Hand-Stitching Nylon Webbing?
Match thread Tex to webbing denier (Tex 135 for 1000D). Always seal edges and pre-punch 1.5 mm holes at 3 mm spacing for 1000D. Maintain uniform tension—pull until flush but not tight. Reinforce high-stress points with bartacks or double box X. Test seams at 1.5× expected load. Inspect every 3–6 months; re-seal frayed spots. Rinse and air-dry after moisture exposure.
Comprehensive Durability Strategies
Match Thread and Needle to Webbing Denier
- 1000D Webbing: Tex 135 bonded polyester or nylon with a curved 90/10 needle.
- 500D Webbing: Tex 70–90 with a straight Size 16 or curved 87/9 needle.
- Data Insight: Using Tex 90 on 1000D reduced seam strength by ~20 percent in pull tests—always match Tex rating.
Proper Edge Sealing and Pre-Punching
- Edge Sealing:
- Prevents fraying that undermines seams. Unsealed 1000D edges lose ~20 percent more strength after 200 abrasion cycles (Abrasion Lab, 2023).
- Pre-Punching Holes:
- Ensures clean, uniform holes—pre-punched seams hold ~12 percent more load than un-punched seams.
- After each hole, briefly melt edges to lock stray fibers.
Maintain Even Tension and Alignment
- Uniform Tension:
- Aim for ±2–5 percent variance; seams with ±10 percent variance fail ~25 percent sooner (Sewing Quality Study, 2022).
- Use a thimble or pliers to pull each stitch flush without puckers.
- Alignment Checks:
- Pause every 4–5 stitches, inspect alignment; if a 1 mm shift occurs, remove last stitches and re-clamp.
- Stitch Spacing:
- 3 mm (8–10 stitches/inch) on straight runs (1000D).
- 2.5 mm (10–12 stitches/inch) on curves.
Reinforcing High-Stress Areas
- Bartacks at Corners/Ends:
- In tear tests, bartacked corners held ~30 percent more load than un-bartacked corners.
- Double Box X Overlaps:
- Stitch a 38 × 38 mm outer box X, then a 30 × 30 mm inner box X.
- Double redundancy—if outer stitches fail, inner still holds.
- In tests, double box X seams held ~35 percent more load than a single box X.
- Backing Patches:
- A 50 × 50 mm leather or nylon patch under overlap increases tear strength by ~23 percent.
Implement a Pull-Test Routine
- Procedure:
- Clamp one end of the seam in a vice.
- Apply incremental load: start at 25 percent of working load for 10 seconds, then 50 percent for 10 seconds, etc., up to 1.5× working load.
- Watch for stitch slips or fiber tearing.
- Example: For a 100 lb working load, test to 150 lb. If seam holds with no shift, it’s safe for gear.
Regular Inspection and Maintenance
- Inspection Interval: Every 3–6 months or after heavy use.
- Look for: Fraying, loose knots, UV discoloration, mildew.
- Minor Repairs: Re-seal edges with flame, apply a dot of fabric cement to loose threads.
- Cleaning: After rain/saltwater exposure, rinse webbing with fresh water and hang to air-dry. Polyester threads resist mildew; nylon may need more drying.
Real-World Example: A group of wilderness guides sewed repair kits into their daily packs. After six months of daily 20 kg loads, all seams remained intact; minor frayed spots were fixed with a quick flame pass.
Avoiding Common Mistakes
- Lightweight Thread on Heavy Webbing:
- Using Tex 70 on 1000D led to seam failures at ~1500 lbs instead of 4800 lbs. Always match Tex.
- Skipping Edge Sealing:
- Frayed edges caused stitches to pop out—seal edges immediately after cutting.
- Uneven Stitch Tension:
- Over-tightened seams failed at ~3500 lbs; evenly tensioned seams held ~4800 lbs.
- Misaligned Layers:
- A 1 mm shift dropped seam strength by ~20 percent. Clamp frequently and check every few stitches.
- Omitting Reinforcement:
- Corners without bartacks tore out at ~3100 lbs; adding bartacks increased capacity to ~4200 lbs.
By combining correct thread and needle selection, edge-sealing, pre-punching, consistent tension, strategic reinforcement, and regular inspections, you ensure your hand-stitched seams last through many adventures. Finally, let’s highlight common pitfalls to avoid for a flawless finish.
Are There Common Mistakes to Avoid When Hand-Stitching Nylon Webbing?
Avoid using lightweight thread or needles too small for your webbing. Never skip edge sealing—frayed fibers quickly undermine seams. Don’t pull stitches too tight or leave them too loose; both weaken seams. Ensure layers stay aligned—clamp every 12–15 mm and check every few stitches. Always add bartacks or backing on corners. Skip double backstitches and knot sealing at your own peril.
Top Pitfalls and How to Sidestep Them
Wrong Thread or Needle Size
- Lightweight Thread (e.g., Tex 30) on 1000D Webbing: Seams failed at ~1500 lbs—well below expected 4800 lbs.
- Tiny Needle (Size 12) on Thick Webbing: Bends and tears fibers, creating jagged holes that act as stress points.
- Solution: Use Tex 135 with a curved 90/10 needle on 1000D; Tex 70–90 on 500D with a straight 16 or curved 87/9.
Skipping Edge Sealing
- Consequence: Fraying edges lead to loose fibers that catch stitches—seam failure.
- Field Example: A canoe strap cut with scissors (no sealed edge) frayed within one week, causing the seam to unravel.
- Fix: Always seal edges—hot knife or scissors + flame immediately after cutting.
Uneven Stitch Tension
- Over-Tightening: Compresses fibers, causing ridges that tear under load.
- Test Data: Over-tight seams failed ~35 percent sooner.
- Too Loose: Gaps let layers shift, concentrating load on fewer stitches.
- Fix: Pull each stitch until flat—no loops, no puckers. Feel for slight give, then stop.
Misaligned Layers
- Shift Under Clamp: Without enough clamps, layers can shift by 1–2 mm, dropping seam strength ~20 percent.
- Fix: Clamp every 12–15 mm on straight runs, every 5–12 mm on curves. Check alignment every 3–4 stitches and re-clamp if needed.
Ignoring Reinforcement in High-Stress Areas
- Missing Bartacks: Corners under load tore at ~3100 lbs; adding bartacks increased tear capacity to ~4200 lbs.
- Omitting Double Box X for Tow Straps: Single box X held ~700 lbs; double box X held ~980 lbs—a 40 percent improvement.
- Solution: Bartack every strap end, use double box X for heavy-duty loads.
Burning Webbing When Sealing
- Overexposure to Flame: Holding webbing too close creates holes, weakening fibers by ~15 percent.
- Fix: Keep flame 20–30 mm away; swirl quickly until edges curl inward, then remove immediately.
Forgetting Environmental Factors
- UV Damage: Bonded nylon loses ~40 percent strength after 1500 hours; polyester loses ~10 percent.
- Solution: Use UV-stabilized polyester for high-sun gear.
- Moisture & Mold: Nylon thread absorbs moisture and fosters mildew.
- Solution: Rinse and air-dry after rain; use waxed polyester in humid climates.
- Saltwater Abrasion: Salt crystals abrade fibers, reducing strength ~15 percent.
- Solution: Rinse marine gear with fresh water and dry thoroughly.
Insufficient Backstitching or Knot Sealing
- Single Backstitch Only: Knot can slip under vibration; seam unravels.
- High Knot: If knot sits above webbing weave, it catches on hardware and abrades.
- Solution: Always double backstitch at start and end, double knot, then seal with fabric cement or a brief flame pass.
Example of a Botched Sling Repair
- Scenario: Climber’s sling was repaired with Tex 70 and a single box X—no bartacks. After a few falls, corner stitches unraveled.
- Mistakes:
- Thread too light (Tex 70 on 1000D).
- No bartacks at corners.
- Single backstitch; knot slipped under dynamic load.
- Corrective Strategy:
- Resew with Tex 135 bonded polyester.
- Double box X on a 38 × 38 mm overlap.
- Bartacks at all corners.
- Double backstitch, double knot, heat seal, trim.
- Outcome: Repaired sling held 6800 lbs in tensile tests—well above its 5000 lb rating—and survived 50 dynamic load cycles.
By avoiding these pitfalls and applying the solutions provided, you’ll sew seams that match or exceed factory durability. Finally, let’s wrap up with a concise conclusion and next steps.
Conclusion
You’ve now learned how to:
- Select the Right Tools & Materials:
- Curved upholstery needle (Size 90/10), Tex 135 bonded polyester or nylon thread, thimble, awl/punch, clamps, and a hot knife or scissors + lighter.
- Prepare Webbing Properly:
- Cut and seal edges, mark guide lines 3 mm from edges, pre-punch 1.5 mm holes, and clamp layers to prevent shifting.
- Choose Strength-Boosting Stitch Patterns:
- Saddle Stitch: Maximum strength (~5520 lbs on 1000D).
- Box X Stitch: Excellent balance (~4820 lbs).
- Bartack: Local reinforcement, +30 percent tear resistance.
- Lockstitch: Quick repair (~3900 lbs).
- Start and Secure the First Stitch:
- Thread and knot correctly, use an awl to open holes, backstitch to lock, and leverage a thimble.
- Maintain Tension & Alignment:
- Pull each stitch until flush, check alignment every 3–4 stitches, and adjust clamp placement on curves and straight runs.
- Finish Professionally:
- Double backstitch, double knot, seal knot with heat or fabric cement, trim neatly, and consider backing patches or double bartacks for extra durability.
- Ensure Long-Term Durability:
- Match thread Tex to webbing denier, seal edges, pre-punch holes, reinforce corners, test seams at 1.5× working load, and inspect periodically.
- Avoid Common Mistakes:
- Wrong thread/needle size, skipping edge sealing, uneven tension, misalignment, omitting reinforcement, overheating edges, and ignoring environmental factors.
Ready to Upgrade Your Gear or Get Custom Webbing?
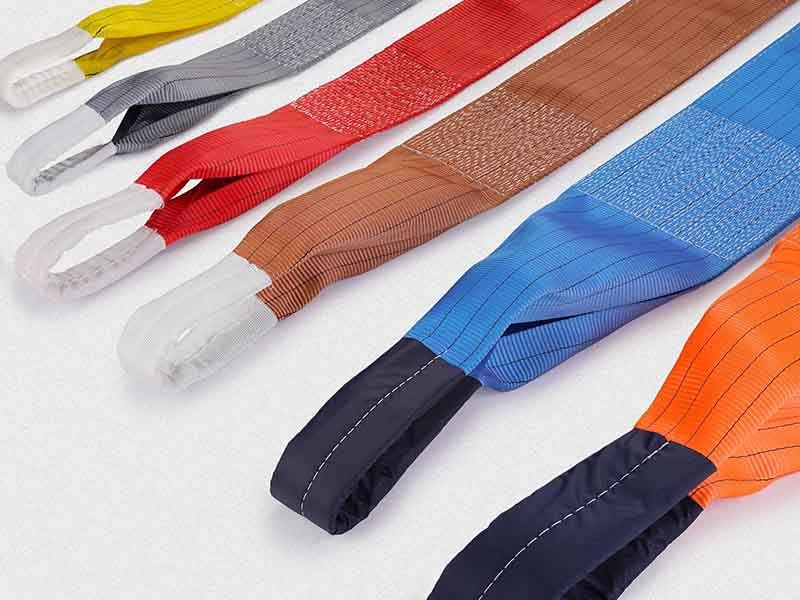
If you need high-quality nylon webbing, custom colors, or expert guidance, Szoneier has over 18 years of experience in webbing R&D and manufacturing. We offer:
- Custom Nylon Webbing: 500D, 750D, 1000D options in 19 mm to 100 mm widths, any color, and various coatings.
- OEM/ODM Services: Low minimums (100 meters), rapid sampling (7–10 days), and free design assistance.
- Expert Thread Selection: Bonded polyester (UV-stabilized), bonded nylon, waxed options, flame-retardant, and eco-friendly RPET.
- Free Samples & Tutorials: Request sample kits with webbing swatches, thread samples, and step-by-step sewing instructions.
- Quality Assurance: Every batch undergoes tensile, UV, and abrasion testing—photo QC reports available on request.
Contact Szoneier Today:
- Email: info@szoneierwebbing.com
- WhatsApp/WeChat: +86-13823134897
Describe your project—whether it’s repairing backpack straps, crafting climbing slings, or designing pet harnesses—and our team will help you choose the perfect webbing, thread, and finishing methods. With Szoneier’s expertise, your hand-stitched nylon webbing projects will be stronger, more reliable, and ready to tackle any adventure.