

- (+86)13823134897
- info@szoneierwebbing.com
From Inquiry to Delivery
 Skip to content
 From Inquiry to Delivery
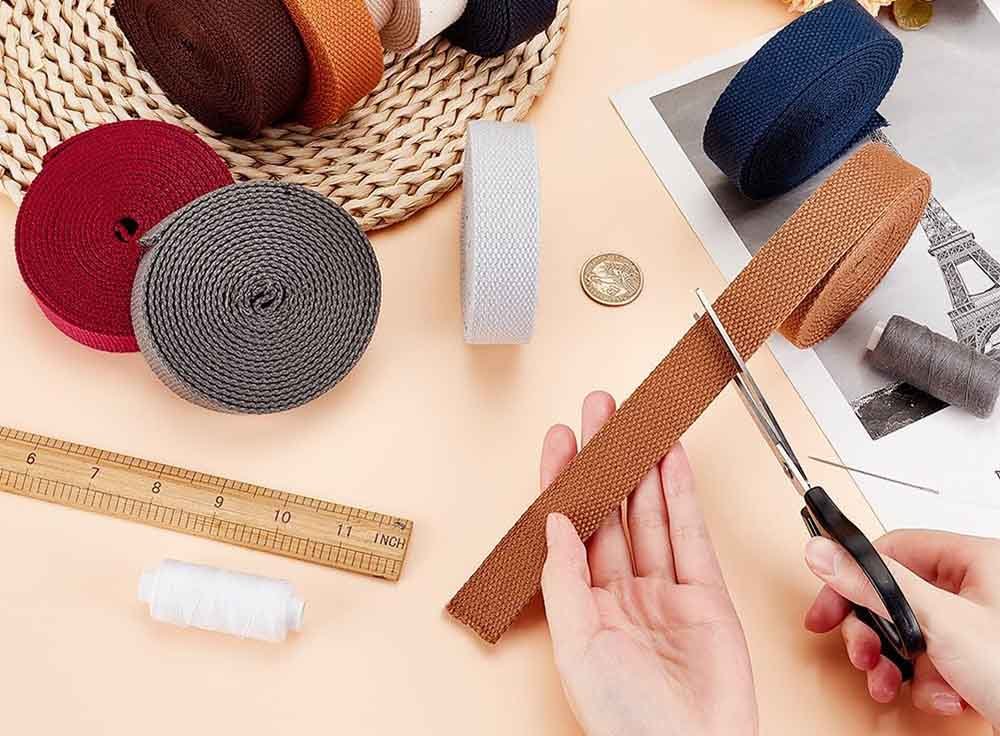
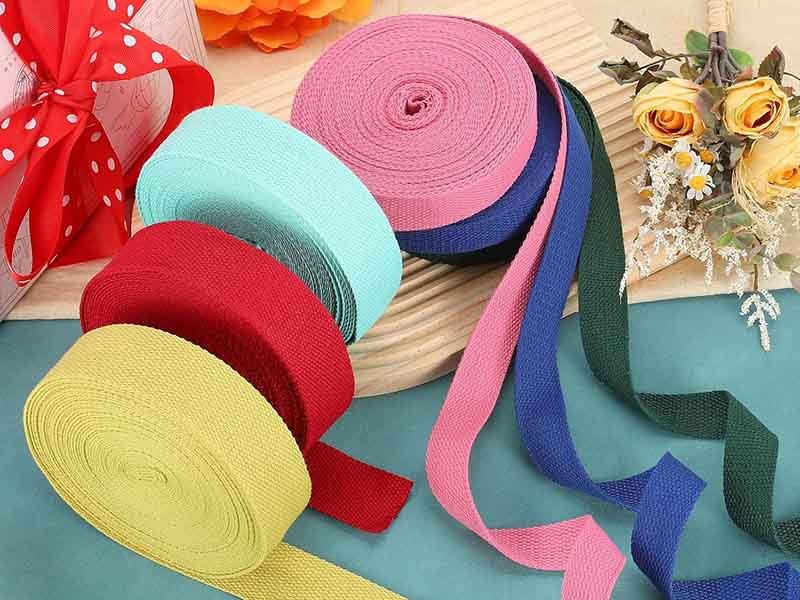
Cotton webbing is the cozy, breathable strap you find on casual tote bags, camera slings, and even some pet leashes. It’s soft to the touch, eco-friendly, and comfortable against skin—but that softness comes at a price. Left untreated, cut edges quickly unravel into a matted mess of fibers. However, with the right approach—smart cutting techniques, edge-sealing methods, and a few inexpensive tools—you can lock down those stray threads and keep your cotton webbing looking crisp for years.
To prevent cotton webbing from fraying, start by using a hot-knife or sharp rotary cutter for clean edges, immediately apply a fabric sealant (e.g., Fray-Check) or cotton-safe adhesive, and finish with whipped stitching or heat-shrink tubing. Regular maintenance—light washing, UV protection, and edge reinforcements—further extends webbing life.
Picture this: you’ve just finished sewing custom straps for your canvas duffel, admiring how neat the ends look—only to watch them start unraveling after one trip through the laundry. Frustrating, right? Stick around as we walk through every tool, trick, and pro tip so you’re never caught off-guard by fraying edges again.
Cotton webbing frays when individual fibers at cut edges loosen under mechanical abrasion, moisture, or repeated flexing. The loose threads unravel because cotton lacks thermoplasticity—it can’t melt and re-bond like nylon. Contributing factors include rough cutting, washing agitation, and exposure to sunlight or chemicals that weaken fiber integrity.
Cotton is a natural cellulose fiber, which means it behaves differently from synthetics. Unlike nylon or polyester, cotton fibers won’t fuse together under heat—they simply burn or char. When you slice a length of cotton webbing, you expose thousands of tiny fibers at the cut face. Every time that edge rubs against hardware, clothing, or even itself during storage, those fibers snag and work loose.
The real culprits driving fraying are:
Consider this data from a textile lab test on cotton tape:
| Condition | Tensile Strength Loss | Observed Fraying After 50 Cycles |
|---|---|---|
| Dry Abrasion (metal) | 5% | Light pilling |
| Wet Wash (mild soap) | 12% | Moderate fiber release |
| Sunlight (200 hours UV) | 8% | Edge fuzziness |
| Flex Fatigue (x1000) | 15% | Noticeable edge splits |
In real-world terms, that means a cotton webbing strap may look pristine straight off the bolt, but after just a few laundry cycles or a weekend hike, its raw ends can start to puff up and unravel. Preventing that begins with understanding exactly why those cut edges are so vulnerable.
To stop cotton webbing from unraveling, you’ll want a sharp cutting tool (rotary cutter or hot-knife) for clean edges, a fray-preventative sealant (like Fray-Check or clear nail polish), heat-shrink tubing or cotton-safe tape for mechanical edge wraps, and sturdy thread with a heavy-duty needle for whip-stitching. Having these at your side means crisp, snag-free ends every time.
| Tool | Approx. Cost (USD) | Pros | Cons |
|---|---|---|---|
| Rotary Cutter + Mat | 10–20 | Sharp, precise, minimal fray | Blade wears out |
| Hot-Knife Cutter | 30–60 | Cuts + seals in one pass (synthetics) | Char on cotton, needs sanding |
| Ultrasonic Cutter | 200+ | Perfect edge, no fray | High upfront investment |
Cotton still shows exposed fibers after any cut—so your next steps lock them down.
| Material | Water Resistance | Flexibility | Ease of Use |
|---|---|---|---|
| Fray-Check | Excellent | Medium | Very Easy |
| Clear Nail Polish | Low | Low | Super Easy |
| Heat-Shrink Tubing | Excellent | High | Moderate |
| Cotton-Safe Tape Wrap | Moderate | High | Easy |
| Thread Type | Tensile Strength | Recommended Needle Size |
|---|---|---|
| Polyester UV-Resistant | High | 16–18 |
| Cotton-Wrapped Polyester | Medium-High | 18–20 |
Armed with these tools—clean cutting edges, the right sealant or wrap, and solid stitching materials—you’ll transform any cut length of cotton webbing into a fray-proof strap that stands up to daily wear and washing.
To seal cotton edges without heat, apply a fray-preventative liquid (Fray-Check) along the cut face, wrap with cotton-safe tape, or insert into heat-shrink tubing and shrink with a heat gun. Let liquids cure fully (10–15 minutes) before handling.
| Method | Waterproof | Flexibility | Shelf Life | Ease of Application |
|---|---|---|---|---|
| Fray-Check | Yes | Medium | Multi-year | Easy |
| Clear Nail Polish | No | Low | 6–12 mo. | Very Easy |
| Tape Wrap | No | High | Indefinite | Easy |
| Heat-Shrink Tubing | Yes | High | Indefinite | Moderate |
Sealing cotton without melting is all about bonding or covering those tiny fibers before they get a chance to snag. In most casual applications—bag straps, belts, or pet leads—a quick Fray-Check application plus a tape wrap is both simple and super effective.
Heat sealing isn’t ideal for pure cotton—it chars rather than fuses. That said, a hot-knife cutter can trim and lightly singe edges, compressing fibers into a hardened bead. For a clean look, sand lightly afterward and combine with a sealant.
While synthetics love heat (think nylon melting into a silky bead), cotton doesn’t share that behavior. Apply intense heat, and what you get is carbonized cellulose—essentially burned fibers. However, many small-scale manufacturers still use a hot-knife because:
| Aspect | Benefit | Drawback |
|---|---|---|
| Cutting + Sealing Combo | Quick, single-step operation | Leaves visible char needing sanding |
| Edge Hardness | High resistance to abrasion | Brittle if overheated |
| Cost | Low equipment outlay ($30–$60) | Ongoing sanding and sealing required |
If you already own a hot-knife for synthetic projects, go ahead and experiment on scrap cotton webbing. You might find the charred bead plus sealant combo works for rugged outdoor straps—just be prepared to sand and seal for a polished finish.
Top fray protection coatings include Fray-Check, clear wax-based sealants, and silicone sprays, while adhesives like polyurethane glue provide flexible, waterproof barriers. Choose based on desired flexibility, water resistance, and application ease.
| Product | Flexibility | Water Resistance | Dry Time | Application Tips |
|---|---|---|---|---|
| Fray-Check | Medium | Excellent | 10–15 min | Avoid over-application |
| Clear Wax Sealant | High | Moderate | 5–10 min | Dab, don’t brush |
| Silicone Spray | High | Excellent | 10 min | Spray from 6–8 in. away |
| Polyurethane Glue | Low-Medium | Excellent | 24 hrs | Clamp edges under weight |
Coatings and adhesives are your last line of defense—after cutting, wrapping, and stitching, a durable sealant keeps whatever stray individual fibers remain locked in place.
Sew a whip-stitch or overlock along the edge using heavy-duty thread, then trim stitch tails and apply a sealant. For decorative finishes, fold the webbing end, sew a box-stitch for reinforcement, and wrap with matching cotton tape.
| Technique | Strength Restored | Ease of Execution |
|---|---|---|
| Whip-Stitch | ~75% | Easy |
| Folded Box-Stitch + Tubing | ~90% | Moderate |
Sewing not only secures loose fibers but also adds a decorative finish—especially useful on bag straps or visible applications. Choose your stitch style based on required strength and aesthetic.
Keep cotton webbing in top shape by rinsing off dirt after use, washing gently in a mesh bag, applying UV-protectant fabric spray quarterly, and inspecting edges monthly for early frays. Store coiled loosely in a cool, dry place away from direct sunlight.
By treating cotton webbing like the prized natural fiber it is—cleaning gently, protecting from UV, and storing thoughtfully—you’ll dramatically reduce fray potential before it even starts.
Accessories like end caps, custom rubber ferrules, leather tabs, and webbing sleeves provide mechanical protection at high-wear points. They absorb abrasion and flex fatigue, deflect moisture, and lend a polished finish—often outlasting the webbing itself.
| Accessory Type | Protection Level | Aesthetic Appeal | Cost (USD) |
|---|---|---|---|
| Plastic End Caps | Medium | Low | $0.20–$0.50 each |
| Metal Ferrules | High | Medium | $0.50–$1.50 each |
| Leather Tabs | High | High | $0.80–$2.00 each |
| Webbing Sleeves | Medium | Medium | $1.50–$3.00 per ft. |
By adding just one of these accessories at known wear points, you can deflect months—or even years—of abrasion and flex fatigue away from the raw webbing, effectively transferring wear to a replaceable part rather than the strap itself.
From clean cuts and sealants to stitching techniques and protective accessories, you now have a comprehensive toolbox to keep your cotton webbing crisp and fray-free. But when you need factory-grade quality, rapid prototyping, and fully customized webbing solutions—from nylon and polyester to cotton and PP—trust Szoneier.
With over 18 years of R&D and manufacturing excellence, Szoneier offers:
Ready to upgrade your webbing game? Contact Szoneier today for a personalized quote and design consultation. Let’s craft the perfect, fray-free webbing solution for your next project!


No worries, please contact us and we will answer all the questions you have during the whole process of webbing customization.
If you have your own artwork, logo design files, or just an idea,please provide details about your project requirements, including preferred fabric, color, and customization options,we’re excited to assist you in bringing your bespoke bag designs to life through our sample production process.

Copyright ©2021 Szoneier , All rights reserved.
Looking for premium custom webbing? Contact us now for competitive pricing, free samples, and expert consultation. Fill out the form below, and our team will get back to you within 24 hours!
 Optimized by Seraphinite Accelerator